Glitter Girl's Scrapbooking Survival Guide :: A New Online Scrapbooking Workshop

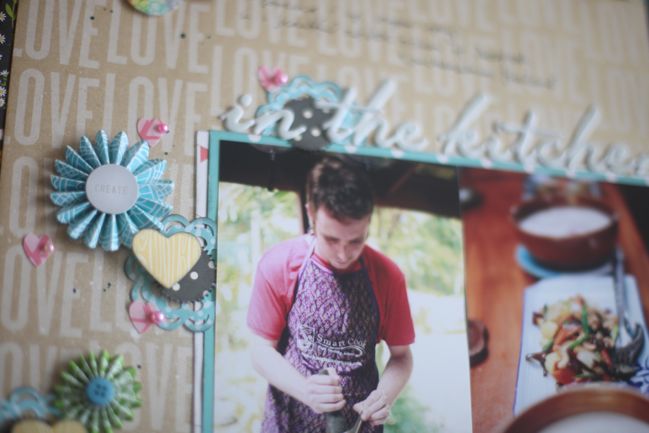
I promised to come back with more details about my new workshop after this quick post, and it’s about time! My sparkly friend Glitter Girl, scrapbooking superhero, has a brand new self-paced workshop at Two Peas in a Bucket, Glitter Girl’s Scrapbooking Survival Guide. You can access all the class materials at Two Peas once you sign up, which includes five chapters each with a PDF and two videos (yes, ten videos in total), which adds up to forty-two brand new layouts, all of which are only available in the workshop. Of course Glitter Girl’s weekly videos will continue and you can watch those any time for no charge! But the workshop format allows for a more in-depth response to five big questions of scrapbooking, from photos to papers and stickers to tools and onto developing confidence in your own personal style. (The sign-up page includes further details about the content, but if you have any questions beyond that, just ask.)
It’s also possible to earn one or even two free bonuses when you sign up:
1. Anyone who signs up by the end of today (2nd of October, US central time zone) will receive an additional extended Glitter Girl video at Two Peas, all about getting the most from your stash. (This will be available as a separate purchase later, but it is free to those early birds who sign up by the 2nd.) You don’t need to do anything to claim this – I’ll go over that on the class message board tomorrow so you’ll be able to find it on your account there.
2. If you sign up through the links in this post (or the earlier post quickly introducing the class), you can claim a second bonus video that is just from me. This is only available to those who purchase by clicking through my link, and you need to follow the specific instructions that follow below to claim it. If there is interest, I may do the same as the Two Peas bonus video and make it available as a separate purchase at a later date. Just to be clear, the Two Peas bonus video is Glitter Girl. The video from my blog is just mild-mannered scrapbooker Shimelle Laine. And indeed, you can earn both if you’re quick!
To earn and claim the shimelle.com bonus video
1. Click from shimelle.com to Two Peas to make your purchase (as in click here to sign up for Glitter Girl’s Scrapbooking Survival Guide). It’s fine if you click around on the Two Peas site, add other stuff to your bucket, take stuff out of your bucket, read the message boards while you’re there, etc! But you need to have clicked from here to get to there. You can be clicking today to make your purchase or you may have clicked from my post last week – both are fine! Moving on.
2. You should have an email receipt for your purchase from Two Peas in a Bucket. Take that email and forward it to shimelle@gmail.com, deleting the original subject line and replacing it with ‘Glitter Girl Workshop Bonus Video’. Literally copy and paste that subject line: it must be the same or it won’t work, as there are computers involved instead of just people. So you removed all the original subject line and replaced it with the copied and pasted version, right? Perfect. Don’t add anything else to the message. I don’t need your mailing address so if that is showing on your receipt you’re welcome to delete it. Okay, now just hit send.
2a. If you didn’t get an email receipt for your purchase, you can also go to your order history at Two Peas (use the dropdown menu by your name at the top right of the screen to get to your shopping history). Find the correct order and you can screen capture the order from there. The capture must include the order number, date of order, the workshop as a named item on your order, and the fact that the order is complete. If that takes multiple screengrabs, fair enough, but if you can get it all in one image it would be really helpful. Attach that to an email to the same address as in step two, but for your subject line, you need ‘Glitter Girl Workshop Bonus Video – Screen Capture’. Again, copy and paste that subject line so it’s just like that. Hit send.
3. You must complete all these steps by the end of the 8th of October 2013, UK time. On the 9th and 10th, an email will be sent for all qualifying purchases with your details for that bonus video! If it’s the 11th and you have not heard, you can email me at the same address above (with a different subject line – no need for something so specific at this point) and I will do what I can to help.
Please make sure you follow these specific instructions as I cannot guarantee you will receive the video if you use a different subject line, send your message after the deadline, or don’t forward the right information. Thank you!
I think that’s about enough of all that email talk, so how about a little look behind the scenes at making a workshop like this come to life?

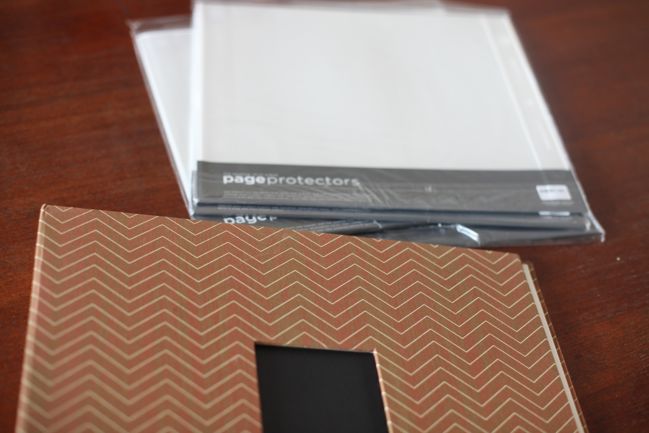
When I start working on a layout-based workshop like this one, it’s an album and a giant stack of page protectors that is my first step. It’s the only time I work on layouts in an album that won’t be their eventual home. Instead they live in this one central place while I’m working on the class materials and at the end of the workshop they go their own separate ways into the appropriate annual or theme album. I start with about fifty page protectors, knowing I can have way more page protectors in the album than normal because each page protector just gets one layout rather than the usual two. Then I start with patterned papers and fill thirty-five to forty of the page protectors with combinations of patterned papers I like. I don’t tend to do full page kits at this point, just papers at first, then I start matching photos to the papers. It takes a little more time selecting pictures than any other scrapping day because with day to day layouts I just want to scrapbook whatever I’m inspired to document. With a workshop, I want to be sure to offer a variety so there are large photos, small photos, and in between photos, there are single photo pages and multiple photo pages, square photos and rectangle photos – it’s an attempt at a balance while also staying true to what I want to work on. I’ve found if I am too strict with my planning, I will lose interest in the process of making all the pages and then I end up with examples that don’t make me happy. The balance for me is to plot out around thirty-five pages but still have the freedom to make some of the pages spontaneously (for this workshop there are forty-two brand new pages and one new version of an existing layout).
Next step: post-it notes! Each layout for the workshop has a place on my master-plan outline, like demonstrating a particular technique. So I write all those things on post-it notes and as I set to work on each layout, I choose something from the post-it stack to make sure I cover. When the page is complete, it goes into the album with the post-it note on the page protector. Because I tend to make that master-plan outline with the chapters in mind, this pretty much puts everything in the right order. A few changes will happen to the order as it all comes together, but for the most part once the layout is in a certain place, it stays there in that same chapter. As the layouts stack up in the album, the workshop really starts to feel like a true body of work, and since video is such an important part of workshops now, it also really helps keep everything organised to show the layouts in the chapter videos.
As for those layouts not started at the very beginning with the thirty-five partial page kits, they get made up here and there from papers that just end up anywhere in my crafting space. What I would show you here if I were twenty times as brave is the state of my studio when I finish a workshop. I tip the place upside down when I’m working on something so intensive, one page immediately following the next and so on. I just set up a giant box next to my table and when I finish one layout, I dump everything in the box and start again. I have a pretty good memory for what I’ve put in the box, so if I want to use the same stamps or Thickers on another page, I know they will be there and not in their usual spot. The box means I don’t have to clean up until the very end… but it also makes me a bit tempted to stick the entire box on eBay because I’m usually pretty sick of looking at those supplies by the end of a workshop and I just want them cleared away! I think that box is my big job for tomorrow, but it is difficult to just put scrapping stuff away all day – as soon as I have three sheets of paper in my hands, I would rather make a layout!
As each layout is completed, it’s photographed, and I also keep a notebook where I messily handwrite my notes on each page that I don’t film for a video because otherwise I will forget what I was aiming for in that layout from chapter one once I’ve finished all the pages right through to chapter five. I keep those notes as I go, but I don’t formally write the chapters till the end, and usually somewhere between the two the important points shake out as most important and that helps me put it all together with some feeling of continuity, I hope!
Now… there is more coming up. A few weeks back I mentioned on the Paperclipping Roundtable that I had started the year with this nice lovely calendar with things projected on different dates but life and work and calendars laughed at me with all that and now I have a bunch of projects that have ended up smooshed together on the calendar rather than spread out with all that balance I crave. The good news is that three of the four projects (this workshop + three things that have not yet launched) are self-paced, and all four will continue to be available, so although they will launch in a tighter timeframe than I planned, you won’t need to cram them all in together nor eek them out of a single month’s crafting budget. I know some of you are waiting for the layering masterclass video, and that is one of the three yet to come, as is the project with the Glitz Designs Wild and Free collection pack. More on each of those things as they are ready for you to dive in!
For now, don’t forget to sign up for Glitter Girl’s Scrapbooking Survival Guide at Two Peas and claim your bonus from signing up via shimelle.com!
And so many thanks for your continued interest in my classes and workshops!
![]() Read more about: adventures-of-glitter-girl two-peas-in-a-bucket
Read more about: adventures-of-glitter-girl two-peas-in-a-bucket
Next post: Five Ideas How to Use Project Life Cards by Wendy Antenucci
Previous post: A quick note about October's Best of Both Worlds scrapbooking kit


