Christmas Gift Wrap Tag tutorial by Mindy Miller

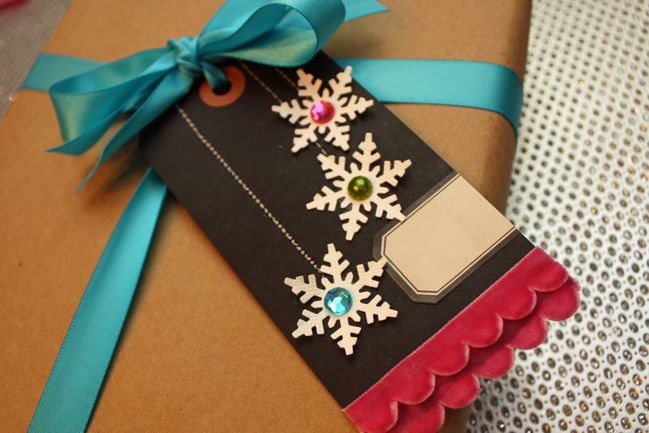
Next up I’m excited to welcome Mindy Miller, who shares her secret for making Christmas gifts look amazing. Enjoy her Christmas tag tutorial and don’t miss your challenge at the end of this post!
Have you started your holiday shopping? Believe it or not, the shopping days are dwindling and it will soon be time to start wrapping.
Here’s an easy idea for handmade gift tags that will see you through the holidays and even into winter.
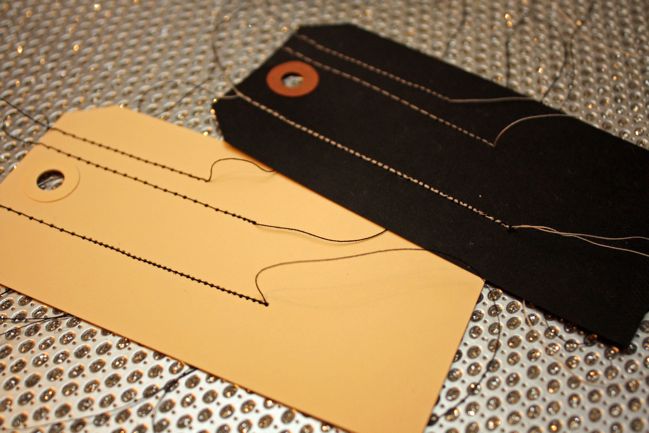
Start with a tag and add three lines of machine stitching. Use a color of thread that will contrast and stand out when stitched on the tag. Pull the threads through to the back side of the tag, knot the ends and cut off the tails.
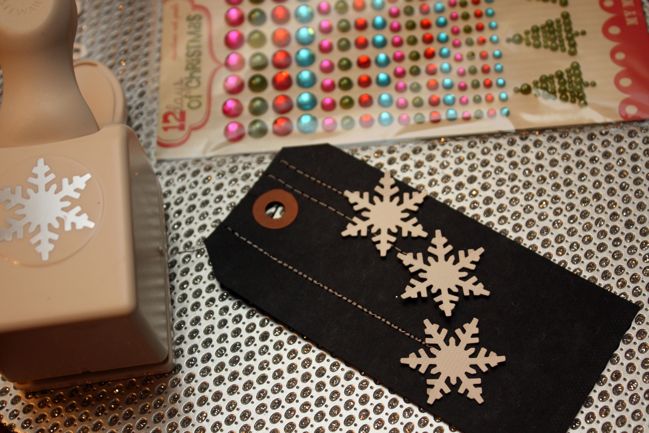
Punch three holiday or winter shapes from cardstock. Again, use a color or patterned paper that will stand out when placed on the tag. Place the punched shapes at the end of each stitched line. This will create the illusion that the shape is hanging from a string.
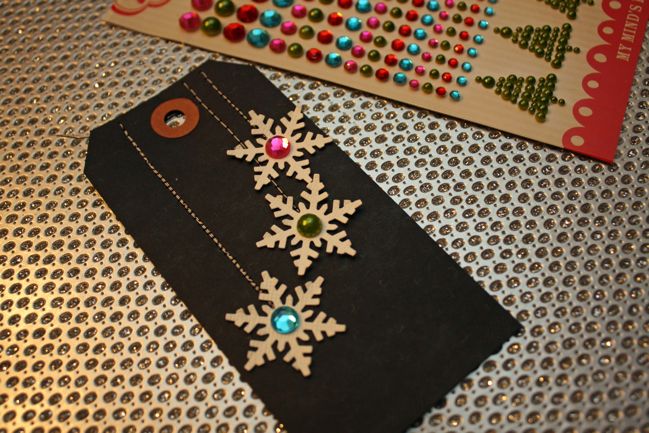
Embellish your punched shapes with jewels, buttons or other small accent. I used the bright and colorful twelve days of Christmas jewels and pearls from My Mind’s Eye.
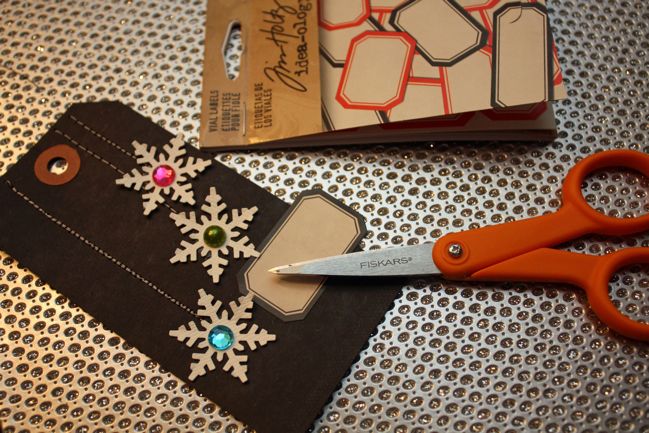
Add a label sticker in the lower right quadrant of the tag. Cut off the excess sticker to the right side.
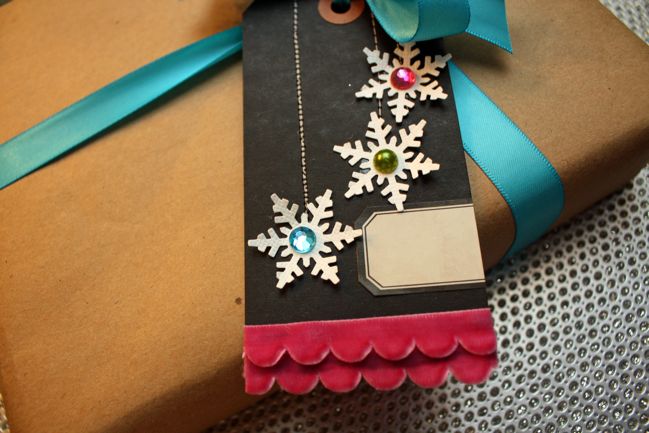
Then add two layers of either scalloped ribbon or a punched edge of cardstock to the bottom of the tag. When attaching the ribbon, cut the length longer than the tag and affix before trimming the edges. Once affixed, trim the edges on each side of the tag for a finished look.

Tie the tag to a package using fun and colorful satin ribbon. Write the recipient’s name on the label and you’re ready for the holiday!
Your challenge: Create a holiday gift tag design that’s easy to replicate! Make one or a bundle. Take a picture and upload it to your blog or an online gallery and leave a link using the button below. Deadline is the end of Sunday the 20th of November and one randomly selected entry will win a $10 gift certificate to go shopping for craft supplies!
About Mindy…
Hi! I’m Mindy Miller, a Kansas girl who loves crafts. You can find me scrapbooking, card making or sewing in my free time. My work has been published in Scrapbook Trends, CARDS and Simply Handmade magazines, plus several on-line publications. In addition, I am honored to have the opportunity to work on the Jenni Bowlin, Fiskars and Scrap-Mart design teams. Stop by my blog and say hello!
![]() Read more about: online-scrapbooking-weekend
Read more about: online-scrapbooking-weekend
Next post: Writing memories on scrapbook pages
Previous post: Christmas Card Tutorial by Leah Farquharson


