pretty paper. true stories. {and scrapbooking classes with cupcakes.}

lovely to meet you Twitter Facebook Pinterest YouTube

Take a Scrapbooking Class

online scrapbooking classes

Shop Shimelle Products

scrapbook.com simon says stamp shimelle scrapbooking products @ amazon.com shimelle scrapbooking products @ amazon.co.uk

Reading Material

travel

Paperclipping Roundtable Category

The Story-Centered Album - A Scrapbooking Course for Listening

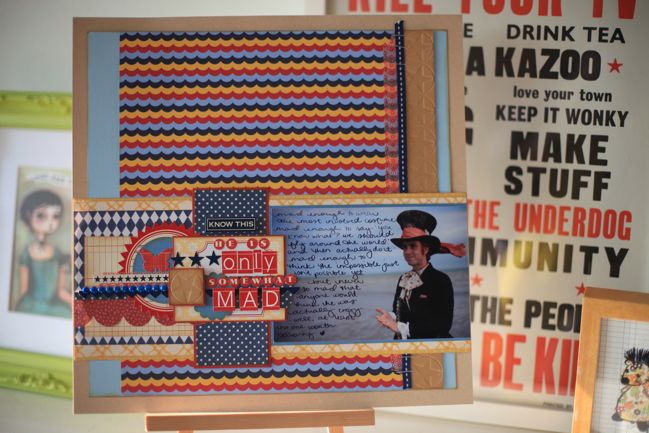
mad hatter scrapbook page by shimelle laine @ shimelle.com

The first time I was a guest on the Paperclipping Roundtable, I sat in the basement of my grandparents’ house, and I distinctly remember my feet bouncing on the floor the entire time from nerves. Somehow I don’t remember how we planned that particular date, as it fell during a visit to my family that I now refer to as ‘the summer my life became an episode of Glee’, because I booked a trip home and then my mother told me I had a part in a musical. Because that is the kind of stuff that happens in my family. I digress. That summer was many years ago now and that first episode of the PRT for me was their thirty-eighth recording: A Metaphysical Bandwagon. Since then, I’ve joined the panel on a total of twenty-three episodes, most recently the CHA report, which is the only episode where we all sit in one room and can actually see each other’s faces. After that recording, Noell asked if I could stick around and discuss something, and she had a great idea that I’m now thrilled to share with you: an all-audio scrapbooking class.

Noell and I recorded about six hours of discussion on a theme: how albums can tell a specific story. This is mostly the two of us discussing our album philosophies in detail with concrete examples, so we share what does and does not work for us, but we also share how it works so you get an idea of all the different page themes and journaling ideas that help us create albums we feel can be read like a story. This is something that inspires both of us creatively and also something that helps the people in our lives who are not scrapbookers to understand our passion for this hobby, because the album makes sense to them even if they have no idea what paper collection is on trend or how to operate a manual die cutter. Izzy also makes a few appearances, getting us to clarify things and sharing ideas for how he sees the story concept working, as someone who isn’t sticking pretty paper together all the time. (He also did the audio production for this course, which is something he does all the time, so the sound quality is professional.)

You can download all the audio files and listen to them on your iPod, phone, computer, or whatever other gadget you use (sorry, don’t think we’re releasing this on vinyl record but otherwise you’re good), and there’s a thread on the Paperclipping forum for discussion if you want to chat about anything. We’re also hosting a webinar for those who sign up straight away, so if you have any questions, we can answer them easily.

You can find all the details and sign up for The Story Centered Album – A Deep Dive Audio Course here.

Those of you who follow my classes here may know I have a more visual course on my own album philosophy, and that continues to be available! It’s called Cover to Cover and includes twenty-five colour PDFs and a series of videos to complement the reading. Cover to Cover discusses more than just my story-centred ‘upgrade’ albums, and really outlines my whole process of all my albums, my photo storage, how I add more photos to my albums, and so forth. Cover to Cover also includes a video workshop I originally taught for True Scrap called “Go with the Flow”, about designing with continuity in embellishment, colour, and other visual cues throughout one album. The early feedback from those who have taken both courses is that they are a good set together, since they each have some ideas in common (the album that tells a specific story) but plenty of different material too (Cover to Cover is just my own process, so you’re not hearing from Noell or anyone else; Story-Centered Albums is focusing on a single type of album, not the entire process). I hope you find that to be true if you’re interested in taking both – it was certainly our aim.

Other things you might find interesting as a complement to the audio course:
The Perfect Collection and Return to the Collection – video workshops on creating stacks of pages (for one album or many) from one collection pack of paper. The first is more focused on stretching the paper to many pages; the second looks more specifically at embellishments.
This post with a look at my ‘early years’ album.
This Glitter Girl episode that shares the Alice album and some title pages from albums we discuss in the new course
The Story Albums episode of the PRT, with Noell and I but also Stacy Julian and Ashli Oliver for a shorter audio discussion but with more voices.

Thanks so much to Noell and Izzy for inviting me along on their new innovation, and thanks to you for checking out this latest scrapbooking course!

Scrapbooking with a Flexible Template

scrapbook page by shimelle laine @ shimelle.com
You might remember when I posted the last Sketch to Scrapbook Page video that it was a little something different – trying a sketch by someone else. This video is the follow-up to that, creating a page that is not strictly a sketch but what Noell Hyman calls a flexible template.


Noell often shares flexible template designs in her Paperclipping Membership videos, but I wanted to work with one that all of you could see rather than just members, so I’m afraid I had to pick an older template. Like I mentioned on the episode of PRT when we discussed all this, I was a little nervous that she might kill me for that. But the design advice she gives is still perfectly sound – it’s just that when you usually work with current collections, it does make older products date unnaturally fast! Noell uses a variety of products and you can see her more current pages on her blog if you’re looking for inspiration in her style with something you’ve just ordered. It may make the most sense if you watch Noell explaining this flexible template first – it’s about five minutes.


Here’s my interpretation, taking it from an 8.5×11 to a 12×12 page, so working with squares rather than rectangles. Almost everything here is from the June Best of Both Worlds kit, with the exception of some enamel dots and the corner rounder.

scrapbook page by shimelle laine @ shimelle.com
And with that, welcome to a weekend of Best of Both Worlds inspiration! I’m not following a set schedule throughout this weekend, but there will be a variety of posts starting now and going through till Sunday night. Some have videos, some do not, but everything links in some way to the Best of Both Worlds kits. You’re welcome to participate in the challenges with any supplies you want (though I do hope you consider a kit at some time!) and all the challenges will stay open till the end of next weekend, so you have a bit more time than just these three days. So let’s call this challenge one then, shall we? Give Noell’s Flexible Template a try in your own style, upload it to your blog or a scrapbook page gallery, and leave a link here. You’re welcome to apply any of these weekend’s challenges to cards rather than scrapbook pages if you would like – whatever you prefer.


Sketch to Scrapbook Page, featuring a sketch by Allison Davis

scrapbook page @ shimelle.com
This week I was guest on the Paperclipping Roundtable podcast, in an episode all about ways to start a page, like sketches, starting points, and flexible templates. (You can listen to the episode here, or find it on iTunes. It’s free.) Allison Davis also joined the panel and if you know Allison’s work, you’ll know our sketches are quite different: she often does double pages, she tends to include many photographs, and her sketches include lots of little details and measurements for making it all fit together. Noell, the PRT host, uses a system she calls Flexible Templates, which is something different yet again: there is no sketch drawn on paper or screen, and instead she keeps a general idea of page structure in her mind as she works, then makes changes as she goes to make each page unique. So in preparation for recording the show, I decided to do a little homework: I tried one of Allison’s sketches and one of Noell’s flexible templates and filmed both so I could share how those concepts worked when combined with my own scrapbooking process.

You can find this sketch in Allison’s post on the Simple Stories blog. There is a link right under the image of the sketch that takes you to a full PDF with all the measurements and details, which scarily means you can also see all the extra photos and details I didn’t include on my page!


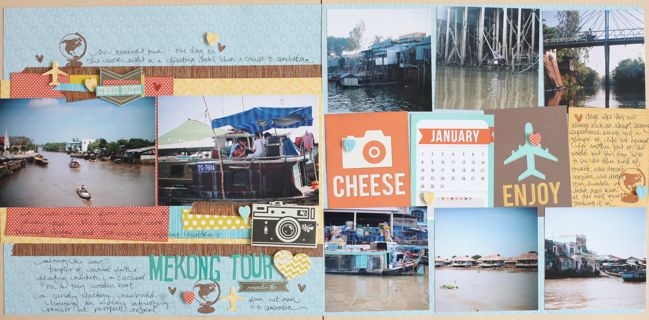
The supplies for this layout are mostly from the June Best of Both Worlds kit, plus a few extras from the supplies I’ve used several times throughout my backpacking albums, to help add a little continuity. I added a second sheet of the camera patterned paper from the kit to make a double page layout, but in the end there is so little of it showing that I think you could omit that sheet of paper without any trouble if whatever paper you wanted on the left didn’t have a twin in your collection. (Of course, you can also create the right side with a divided page protector and forego the 12×12 background completely.)

scrapbook page by shimelle laine @ shimelle.com
The original sketch includes nineteen photographs, and that’s just a bit too far for me, so I went with eight in the end. Six of these are just shy of 4×4 and two are 4×6, and it’s those 4×6 images that led me to make some bigger changes on the left side of the layout than I first imagined, but it worked its way out I think! Neither of those photos were images I wanted to crop, and that led to my first big realisation with working with this sketch: I prefer the composition of photos in the 4×6 set up. I certainly have square photos! But they tend to be just an image or two of any given event, as I will always use my traditional camera, not my phone, for the more photogenic stuff of life. I’ve spent years trying to improve my composition in that format, especially trying to find a good shot quickly, as all the photos on this layout were taken from the side of a relatively speedy boat. I looked at several different sets of photos trying to find images that would be improved by cropping to a square, and they were hard to find, so in the end I kept two of the images at their full size. I felt bad that I was cheating Allison’s sketch in what was supposed to be my homework, but at least it came with a little caveat that I was happy with how my photos were coming out, straight from the camera. I know that when I put a sketch together, I’d always be okay with changes like photo size or number, so I hoped Allison would be the same, knowing the sketch was still tremendously useful in putting everything together! (If you listen to the show, I think we’re on the same path with that one. Fabulous!)

One thing I really liked from this sketch that I don’t think I would have put together without it was the balance of the large, simple motifs on the cards on the right side with the smaller, more detailed embellishments on the left side. It’s the kind of balance that depends on something being the same but different, and also that several small somethings can add up to equal one big something. That’s definitely something I want to remember for future designs, as this is a bit different to the double pages I tend to create without a sketch, and I really like this look. Plus I have plenty of 3×4 cards, especially for a scrapper who doesn’t keep a regular Project Life album or anything! I’m all for bookmarking different ways to include 3×4 cards on a 12×12 (or 24×12) page.

As this sketch isn’t my own, there’s no guest or link up here, but you can find Allison’s interpretation of the sketch, complete with thorough notes, on the Simple Stories blog, and if you give this sketch a go, I know Allison would love to hear from your in the comments there. And see more of Allison’s work on her blog.

Next up, I give one of Noell’s templates a try! And you can hear us all talk about this entire process on PRT episode 166. I hope you enjoy!

Scrapbooking with scraps of paper :: A new episode of the Paperclipping Roundtable

scrapbooking papers @ shimelle.com
A few days ago Noell from Paperclipping sent me a message asking if I might do an episode of the Paperclipping Roundtable all about scraps of patterned paper. Patterned paper scraps? On the PRT? That’s all kinds of yes. Because honestly, there are days when I feel I could write a book with what to do with scraps of paper. I spend a lot of my working days with bits and pieces of paper, and I’m pretty okay with that. So yes, Noell, yes I would be delighted to talk about scraps of paper on the Roundtable!

We recorded this just a few hours ago, but you can listen already. PRT Episode 155: Torn by Patterned Paper. You can also subscribe for free in iTunes and listen on your computer or mobile device. Just search for Paperclipping Roundtable in the podcasts section and you’ll find it!

This episode started with a reader (maybe listener is a better word in the case of a podcast?) comment that each of us (fellow guest Erin Bassett, host Noell Hyman and I) thought about for a while on our own, then we got together online to chat about it. It was surprising which things we all had in common, but of course we had some differing ideas too. So that original prompt to start the episode was from Laura McCarty:
I watched a membership video of yours [Noell’s] and then one of Shimelle’s. You both use a lot of pattered paper and I LOVE how your layouts turn out. But I’m so torn about using so many sheets for a single layout. I am intimidated by using the leftovers. What to do when you’re a scrapbooker afraid of the scraps?

Of course we discussed our answers on the show, but I also wanted to compile some references for you here in case this is a topic near and dear to your scrapping heart!

Storing your scraps
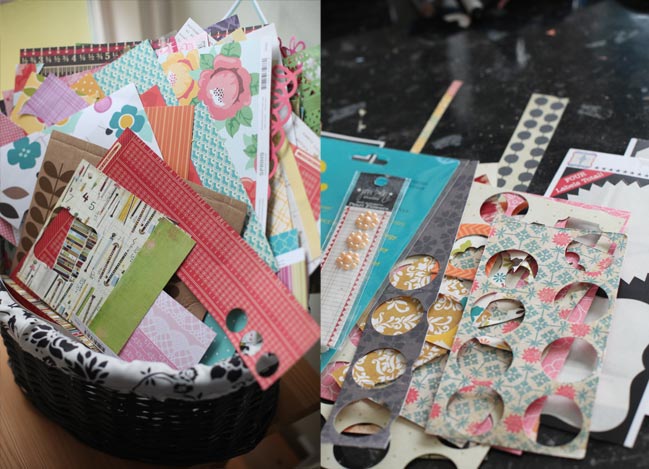
This was something we all had in common! Between the three of us, there wasn’t a single sorter or organiser! I keep something I call my scrap basket (that’s it at the top left of this post) and when I clear off-cuts of paper from my desk, I literally swipe it all off the side and into that basket! When the basket gets too full, I remove a bunch from the back and it goes into my donation box and I don’t look back. Noell and Erin have similar boxes, tins, and baskets for keeping their paper scraps and none of us devote time to organising them in any certain way. We find that the random mixing of different papers in the controlled space of one container helps us find new combinations for colours and patterns that we might not have discovered purposefully if we were selecting full 12×12 sheets from our collection. Yet the single space for these scraps keeps them from taking over and reigning in chaos.

I’m very aware, however, that not everyone’s creative process is fuelled by random, and some scrappers really prefer to have the order of separating their scraps by colour or pattern or manufacturer. We had a great discussion about it here during a previous online scrapping weekend, and you can find that discussion here. Scroll down to the comments for the good stuff, because there are dozens and dozens of replies that share different methods for storing scrap papers and off-cuts.
scrapbook page by shimelle laine @ shimelle.com
Worrying about value
I know it literally stresses some of you out to see a piece of paper get ‘wasted’ by being mostly covered by another sheet or using the b-side that is a subtle polka dot rather than the bold and beautiful floral of the a-side, for example. Right now there’s even an entire thread discussing patterned papers used for just a quarter inch frame around the whole of a 12×12 page at Two Peas. Here’s how I view the value question: once I use a patterned paper once, it has ‘earned’ its value that I paid. If I get more from that page, then that’s a fabulous bonus. But using it once means it was worth buying and I’ve invested well, unlike some of the patterned papers that sit on my paper rack and eventually leave here still as full 12×12 sheets, off to some other crafter! Take that idea of using a patterned paper for a quarter inch frame around a page: sometimes I will save some of the centre since it will be covered, but other times I won’t. It depends on so many things, including my mood and whether the other patterned paper on top is sturdy or flimsy! I don’t show this step on video because it doesn’t need explaining and it doesn’t make for very exciting viewing, so just because you don’t see it happen on a video doesn’t mean it doesn’t happen at all. But I really don’t have any problem covering up another sheet of paper because I know this might be a surprise, but patterned paper is really not in short supply around here. There is plenty to go around, even for quarter inch borders. I know I’m not the only scrapper with an extreme amount of paper to hand!

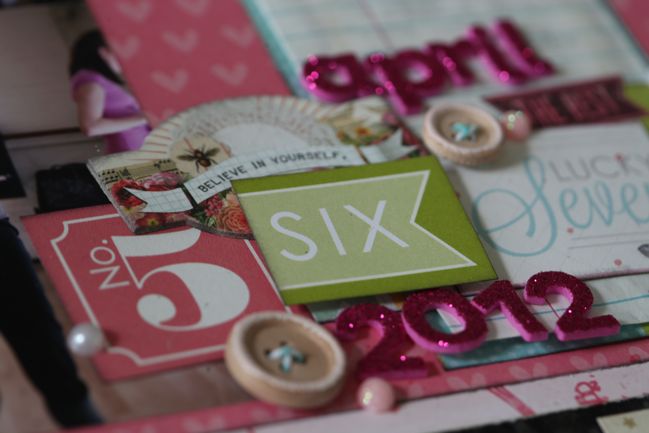
But a specific query has come up a few times with my classes, and that’s how layering often means you’ll only see a tiny little bit of any particular patterned paper. That’s true! And showing just that tiny bit is an essential part of that look – it will not work with big sections of each paper on display, which would overwhelm the photo. When I first cut into a 12×12 pattern for a page, that tends to be the time I will really feature the pattern on the page. Then the rest goes into the basket and anything in the basket is fair game for being tucked and layered and almost entirely hidden. I love the subtle continuity this can create in the scheme of an entire album, how you will have seen one pattern somewhere and then elsewhere you’ll see just a tiny bit of it and without seeing the full design, you’ll actually know what it looks like. Maybe that will help the worried crowd know that when you see just a tiny bit of a patterned paper on my pages, it’s rare that I will have cut that from a full sheet of 12×12 – chance are I have already used the pattern elsewhere and now the rest of the sheet is fair game for any placement that might work on the page. But also, I am really not scared of cutting or using new papers, largely down to my experience with what I call the story of the special paper, something I know many of you have already read. It’s one of those things I come back to so many times when I’m scrapping: use it while I love it, otherwise I really will fall out of love with it and then the purchase is a total waste! That is what I aim to avoid, so I am fearless in using what I’ve purchased while it’s still new and exciting to whatever creative part of my mind makes all this stuff work.
scrapbook page from Scrapbook Remix @ shimelle.com
Patterned Paper class resources
There are a few different classes and workshops from my corner of the world that could be useful to you if you’re aiming to make more from your scraps or get over the fear of cutting into perfectly lovely sheets of pretty paper. The Hitchhiker’s Guide to Scrapbooking covers a lot about layering in addition to ways to choose your products and just plain get started. It is suitable for beginner scrappers or scrappers with experience who feel they haven’t really found their style or really struggle knowing where to start. Many scrappers have told me they took this class after returning from a break from the hobby and that it successfully got them scrapping again, which makes me very happy to hear! But I also think that helps you know where it sits in terms of an ‘is it right for me?’ scale.

For something quite light, The Perfect Collection is a stand-alone video workshop designed for using up every bit of a collection kit. (We talked about this on the show – this is the class with the guides to different sizes you can cut.)

For something with more detail and specifics, there are two classes here: Pretty Paper Party and Scrapbook Remix. Pretty Paper Party came first, and is more technique-based – covering different things you can do with papers. It includes both scrapbook pages and cards (and a couple mini books) as examples. Scrapbook Remix is a more recent class from 2012 and it focuses more on the idea of how to mix patterned papers, with plenty of examples of how one paper collection can be mixed and ‘remixed’ with other papers to take on many different looks.

All of these classes can be taken any time on a self-paced format. (The first example is hosted at Two Peas; the rest are all hosted here at shimelle.com.) On the PRT, I mentioned I could be persuaded to set up live emails for those who would like to do Scrapbook Remix right about now. I don’t often rerun classes, but earlier this year we did this with Pretty Paper Party so a group who had missed it on its original live run could participate all in the same time frame, and I don’t see why we couldn’t do that for Scrapbook Remix, and start next Monday. You can sign up for Scrapbook Remix at any time, but you will need to let me know if you want to receive emails for this special PRT-inspired repeat. (If you signed up months ago, you’re welcome to get in on this – you do not need to pay again.) Just send an email to shimelle+remix2013@gmail.com with the subject line ‘Yes Please’. Ideally, make this message come from the same email address you used to sign up for the class! If that’s not possible, or your emails need to be sent somewhere else, please indicate those addresses in the message. (Because I will need to collate this list of email addresses by hand, it is really important that I be able to match your email address from your request to the payment you made, whenever that may have been.) I will need your request by Sunday morning if you want to start receiving messages on Monday! Okay? Go, go, go if you want in on that!

scrapbook page by shimelle laine @ shimelle.com
Free resources for using patterned paper scraps
Of course Glitter Girl has used her share of patterned paper scraps, and scrapping to the end of my Best of Both Worlds papers each month is making me do a lot of that too! So here’s a quick round up of some links that might be useful:
Glitter Girl’s tips for mixing and matching different patterns, with one big tip for colours
Glitter Girl’s tips for using your scrap papers as embellishments, instead of spendier premade items (Glancing at the supply list for that one, there is a lot that is now on sale, so that would make things even more affordable!)
Glitter Girl’s tips for choosing patterned papers for your page, which is something a little different to what we discussed on this episode but I think it’s probably still relevant in applying what we did discuss to making actual pages with your photos
and the most specific Glitter Girl episode on this topic: Three Scrap Strategies, all about three different page designs you can make easily with scraps and off-cuts, and it will always look different when you choose a different mix of patterns.
From mild-mannered scrapbooker Shimelle Laine, you’ll also find the end-of-month kit wrap-up posts like this, include plenty of scrap-built pages (see also this and this). Many of the tutorial posts can be done with scraps, like this one combining scraps with a single stamp to form most of the page. Even if you go back to older posts like this, you’ll find there is still a lot of cutting patterned papers into those similar sizes. If you get so far back that the patterned paper disappears to a world of all cardstock layouts, then you’ve gone too far. (For my pages anyway. There are some who can still make the cardstock look fabulous… I’m just not one of them!) Stop and step back into the present and enjoy all the patterned paper!

I hope those are some useful resources and more than anything, I hope you enjoy the new episode of the Paperclipping Roundtable!
On the Paperclipping Roundtable Scrapbooking Podcast :: Story Albums

On the Paperclipping Roundtable Scrapbooking Podcast :: Story Albums
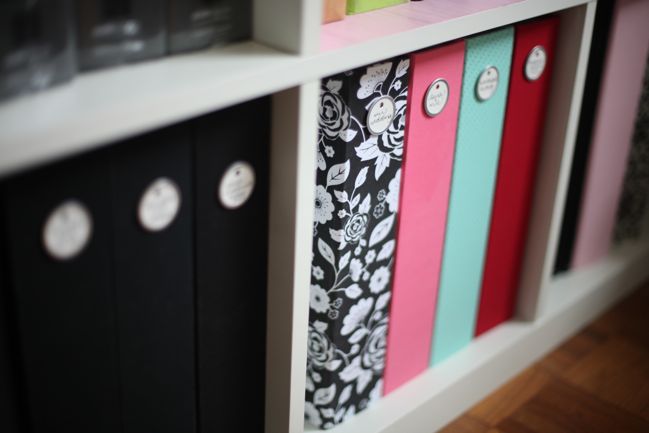
scrapbook albums from shimelle laine @ shimelle.com
Today I had my alarm set for quarter to six in the evening to wait for a call from the team at Paperclipping – so we could record a new episode of their podcast, The Paperclipping Roundtable! I was so excited to talk about one of my very favourite topics – album systems – with fellow guests Stacy Julian and Ashli Oliver, host Noell and producer Izzy, of course. We covered all sorts of things and had a moment or two of talking all at once, of course. You can listen to the episode now via the Paperclipping blog or through iTunes.

scrapbook pages by Shimelle Laine at shimelle.com
We covered a lot of ground quite quickly, so I hope it wasn’t too overwhelming. I’ve tried to go through and find all my posts about how albums work for me, and it’s quite a bit of stuff! But I can at least make it a little easier to find. If you’re new to my album philosophy, here’s some further reading for you in the archives:
Cover to Cover is my album class. You can sign up any time and work through this as a self-paced workshop. (You do not need to wait for it to run live as it has finished its live run and I don’t tend to repeat classes on a schedule like that. If you feel you’ll do better with a team effort, ask a friend or post on Two Peas and you’ll likely find at least one other scrapper who will join in with you at the same time. You can keep each other accountable!)

Sorting pages into albums describes my process as I got a handle on what I wanted to do with my books and made that happen over a very rainy weekend.

A look inside my Early Years album shows how those new pages live right alongside the old. Also, if you scroll down below the pictures in that post, there is an Album Q&A that may answer some basic questions about what albums I use and so forth.

General notes on why I think albums are awesome, which may sound strange but there are plenty of scrapbookers who don’t use albums at all and the very idea leaves me sad and confused, because I depend on albums every single day. (That’s just me, of course.)

Maintaining album continuity is a video I created for the Two Peas Design School series that expands on the kraft-and-a-camera idea I discussed on the PRT this week.

There are also some videos that show albums. You can see Early Years pages here, volume one of our Round the World trip here. (There are more album videos in Cover to Cover too.)

The workshops I’ve done for True Scrap in the past also include different angles on my album philosophy. The first two workshops – Creative Stash Diving and Go with the Flow – are included with Cover to Cover. (Go with the Flow is what Noell was referencing as knowing I liked to pick up visual cues in my albums, as she was also an instructor at True Scrap. That workshop video is all about planning one section and making it all come together with continuity in the design.) The third workshop is The Perfect Collection, which is available on its own rather than with Cover to Cover. It’s all about using a collection pack or a kit to create a stack of pages, which might be a specific album depending on a few decisions you make in the process.

When it comes to writing in my albums, you might find Tips for writing about places, True Stories or Write it Down to be useful.

scrapbook pages by Shimelle Laine at shimelle.com
Random other things I mentioned on this episode include:
The 7-Up documentary series, except in my excitement of wanting to share that with Stacy I was way off on their ages – the most recent edition was indeed 56 Up this year. I have only seen the UK and USSR versions, but on reading more via that link, I’m very intrigued by the Australian edition as it was a Gillian Armstrong project, who is rather amazing. Anyway, Stacy’s pick for the week, The 5000 Days Project instantly made me think of the 7-Up series, so I just wanted to mention it quickly.

Gathered was my pick of the week. It’s a weekly craft magazine for the iPad from the makers of Mollie Makes magazine and it’s just beautiful. Simple, weekly, crafty and pretty.

Luang Prabang, Laos and Nong Khai, Thailand were the places I mentioned in the specific example of looking through an album and thinking consciously about the part of the story that’s missing and how I want to connect the two sections through the visual style and journaling.

Scrapbook Remix is the online class that just started, all about mixing patterned paper collections. You can still join in, of course! We’d love for you to mix it up with us.

If there’s anything else I missed that deserves a link or more explanation, just let me know! And if you want to discuss the topic with all the panelists and listeners, be sure to leave a comment on the episode post at PRT. It might even be discussed in the mail segment next week!

Thanks to the PRT team for inviting me – it’s so much fun to be on the show.

xlovesx

The Paperclipping Roundtable discusses scrapbooking older photos

paperclipping roundtable
scrapbook page with old photo
I have to admit I love the process of preparing for the Paperclipping Roundtable almost as much as the show itself. We get the theme a day or so in advance and I love being able to just think it all through! We recorded a new episode today and it is already online! Angie Lucas, Jessica Sprague and I join the regular team of Noell and Izzy for episode 128: Mushrooms and Daisies.

scrapbook page
In this episode, we’re discussing some questions brought up by listeners over the past several months in regard to scrapbooking older photos. This page was one that came to mind in our discussion of subtle patterns. As it’s late here, I’m going to listen tomorrow and I’ll share a few more pages and thoughts. I was frantically scribbling a few notes during the show when I thought of a page that was relevant to what we were discussing, but can I figure out what those notes say now? Of course not. Plus if you have listened to the last few episodes you’ll know there is this new thing that happens with Skype where you can’t always hear the full discussion, so although it can be ridiculously tough to listen to my own voice on the recording, I’ll have to get over it so I can hear some of the things I knew I was missing!)

This is the first time I’ve ever chosen a pick of the week I don’t have in my own hands just yet! I ordered it and am so excited for it to get here. It’s the Dewey Decimal collection by Lawn Fawn. And I wanted to pick something relatively school-themed to also mention that the International Day of the Girl is coming up soon – the eleventh of October (so in the US, that date would be 10.11.12). I’m working on a little project for that day here, and if you’re interested in putting together something in your own corner of the world that helps all the girls of this world who don’t get awesome opportunities like free schooling, go for it and get involved. Lots of good time now to plan something, and there is no thing as too small.

Click here to listen to this episode of the Paperclipping Roundtable!
(you can also listen or subscribe in iTunes – the PRT is free.)

Hope you enjoy!

xlovesx

My Scrapbooking Lunchbox

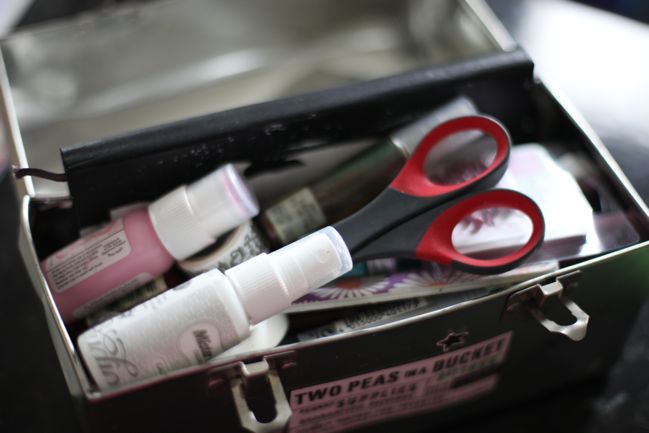
my scrapbooking lunchbox
scrapbooking lunchbox
After last week’s Paperclipping Roundtable, I’ve been having all sorts of discussions about scrapbooking in random locations. The knitters get organised with this sort of thing and celebrate with worldwide Knit in Public day, but we seem to be less ready for such an event… but I promise it really isn’t all that difficult in the slightest.

With my crazy over-zealous page kitting recently, I know just reach for my most basic of tools when I head out for some away-from-home scrapping. If I want to scrap in the park, I will a) celebrate that it has finally stopped raining and b) pop my scissors, pens and adhesive roller in my handbag. If I can manage it, I’ll also take either my brown or black ink pad and applicator, since I tend to use that on pretty much everything, but it does require the added step of putting it in some sort of protective bag otherwise everything in my handbag shall be covered in ink. I’m all for organic art, but that’s a step too far.

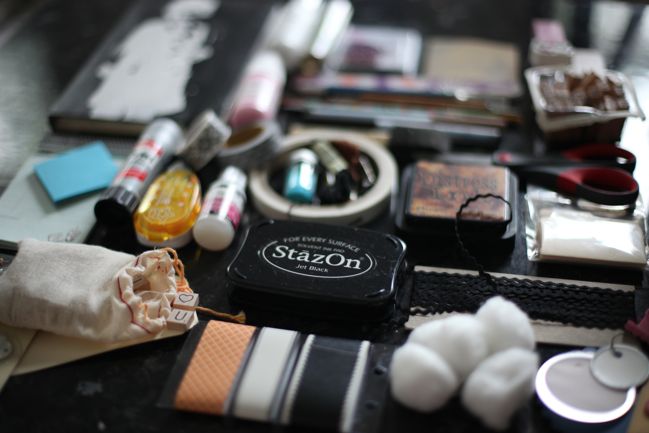
scrapbooking supplies
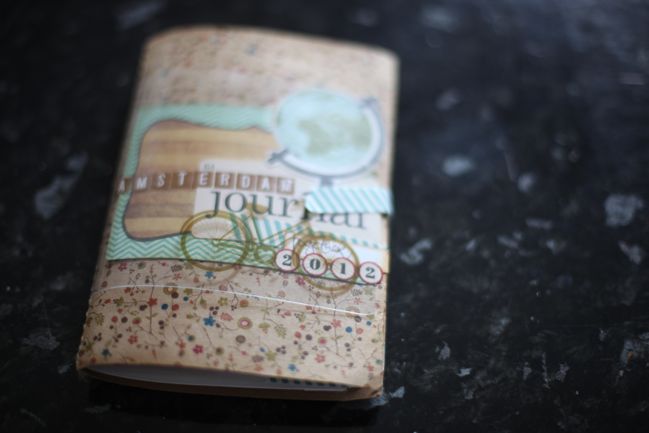
But there are other times when I don’t have page kits ready and that’s when I take my lunch box. It’s filled with basic tools plus an assortment of things that can be useful, so I can pretty much make something with only a little bit more. Add just the journal itself for journal entries, or some card blanks and a 6×6 paper pad for making cards, or larger papers for scrapbook pages. When I used this on a regular basis, I also kept a small tote bag (really small – not something heavy, just something small and easy!) with scrap papers, and that would be plenty to work on whatever projects I had in mind. That was probably the start of my good use of scrap papers, actually. Before that I spent a lot of energy keeping them separated by colour and pattern and although I spent a great deal of time putting things away, I very rarely took the scraps back out again!

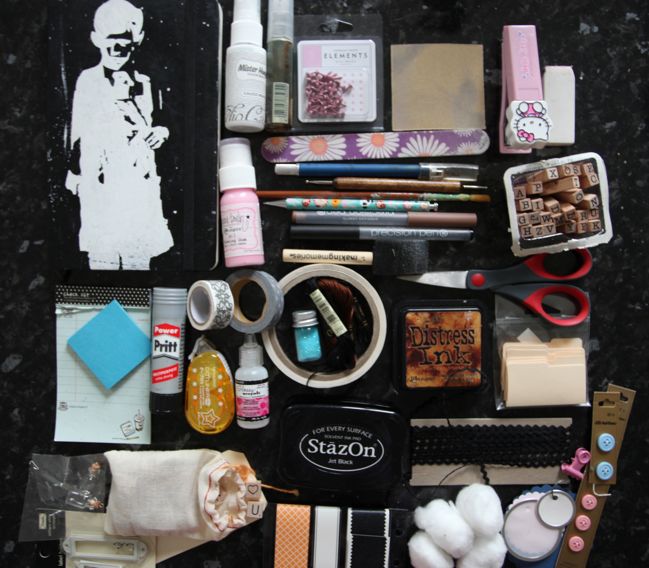
scrapbooking tool kit
I emptied the lunchbox just as it is – untouched for several months really – and this is what was inside, starting from the top left. A journal. Mister Huey spray ink in white. Empty mini spray bottle for mixing up different colours, walnut ink, etc. Pack of mini brads. Square of sandpaper. Mini stapler. White eraser. (Moving to the second row, from the left.) Jenni Bowlin paint dabber in chewing gum pink. Selection of pen-sized tools, including nail file, craft knife, stylus, paint brush, mechanical pencil, brown and black writing pens, foam paint brush. Set of letter stamps. (Back to the left for the next row.) Post-it notes and mini to-do list notepad. Super duper silver Pritt stick (still my favourite for paper to chipboard). Two rolls of decorative tape. Mini adhesive roller (this kills me: it’s Kokuyo in star shaped dots instead of the normal little circles. I picked it up on holiday.) Glossy Accents liquid adhesive/gloss finish. Double-sided tape (on the large roll). Turquoise glitter. Black and brown embroidery floss and a sewing needle. Scissors (smaller than my usual pair). Distress Ink in vintage photo brown. Random little accent of several tiny file folders. (New row.) Bag of 7gypsies scrabble-style letter tiles. Pack of Making Memories metal frames with brads. Staz-On ink pad in black. Adhesive ribbon-finish tape from Martha Stewart. Black rick-rack. Cotton wool. Assortment of small die-cut circles and tags. A few coloured paper clips and some buttons.

That all fits into the lunchbox without any trouble! I’ve packed more in there by piling stuff into the space at the top, like a watercolour set, a roll of coloured pencils, a pack of odd playing cards… but really there is plenty here to make quite a bit!

So I promise you really can have a lot of creative freedom even while you’re on the go… but what would you pack in your lunchbox? And I think the answer of ‘lunch’ is considered cheating.

xlovesx

On Scrapbooking Outdoors & On the Go

on scrapbooking outdoors and on the go
mini travel scrapbook
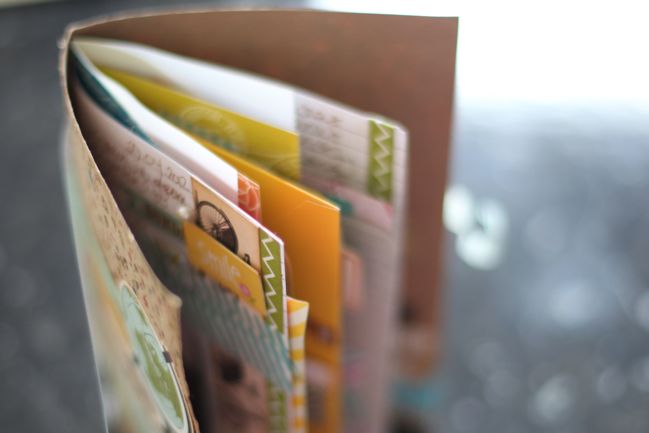
Last month I had so much fun shopping for supplies to design the minibook crafting kit for Jenni Bowlin at JBS Mercantile. And apparently the Mercantile subscribers thought it was pretty fun too, as it sold out before I even had a chance to blog about it! (Thank you!) But today seems like pretty good timing to share my finished mini, considering most of this was created outdoors or at the very least on the road… and that’s exactly what we’re discussing on the latest episode of the Paperclipping Roundtable!


You can listen here by pressing play or you can listen via streaming or download on iTunes (it’s free to subscribe on iTunes and get each new episode as soon as it’s available). Check this post for post-show discussion in the comments.

This week Amy Tan and I were the guests of the regular crew of Noell, Izzy and Nancy to chat about scrapbooking and crafting outdoors, and there is some humour in how all of them live in much warmer climes but I will take any chance to scrapbook outside that I can! But I think that is part of living somewhere that isn’t always sunny – we all head straight out the door as soon as it’s a lovely day, just in case there isn’t another for weeks! I definitely see that attitude in our local park… it’s just that most people take a picnic or a football out for their sunny day, while I tend to bring a scrapbook page! (For the record, this still works even if The Boy and I head out together – he takes something to read and I cut and paste It works.)

In the episode, we talk about what we scrapbook outdoors, and I’ll certainly work on 12×12 pages without any trouble, but in this case it was a travel journal, filled in as we went, sitting outside in parks, at cafes, on the train and so forth. I started with this kit but if you wanted to assemble something similar, you can find almost all of those items here so you could pick and choose if you already have some elements in your stash. (By the way – I also made a few 12×12 pages from the kit in addition to the minibook.)

mini travel scrapbook
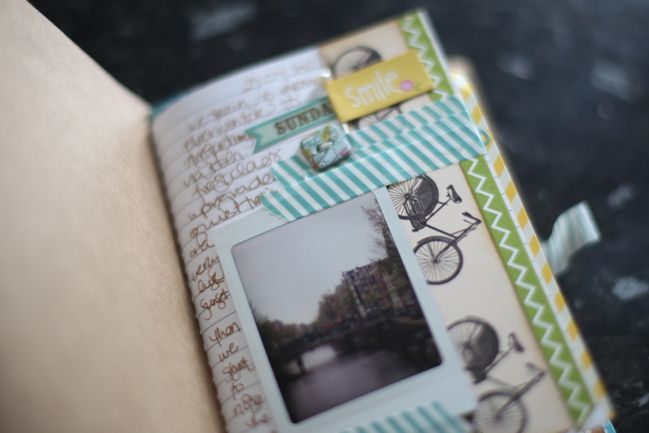
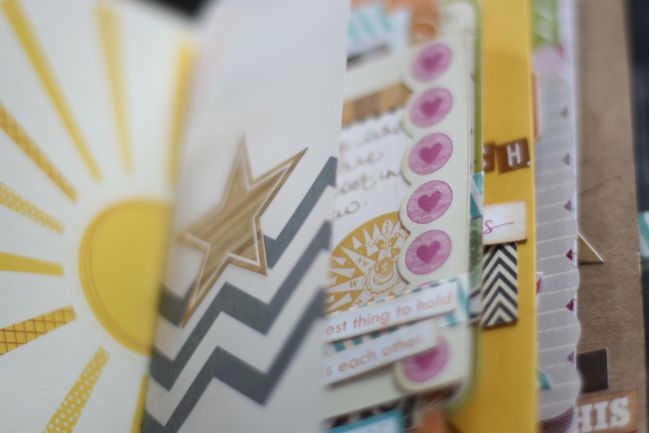
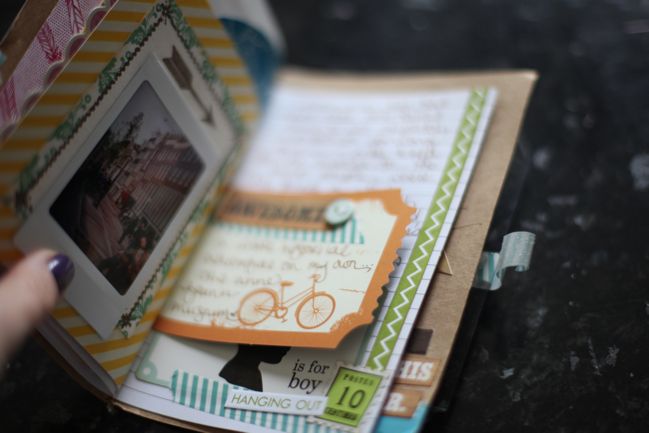
The base for the book is one of Amy’s Daybooks – my pick of the week on the Roundtable. (There are several styles available here.) It comes prebound with a variety of pages inside – different shapes and patterns and colours, plus an envelope and sticker sheets. The bicycle cover is my favourite because the sticker sheet is a tiny alphabet, perfect for adding titles and captions as you go.

mini travel scrapbook
I used my DSLR to take photos throughout this trip, and printed them on the road with a Pivi printer – a tiny little gadget that attaches by cable to a digital camera, then prints the digital image as an instant photo, like a mini Instax. (I love the Pivi but it is a real treat – they are only widely available in Japan. I bought mine from an international seller on Ebay and stock up on the film packs the same way. The film packs are different from what you would put in an Instax camera, so importing is the way to go. But it is fantastically fun!)

mini travel scrapbook
I love that the Daybooks are small enough to pop in my handbag or the pocket of my backpack but they can work with that same philosophy of a Smash book – just sticking in bits and pieces from daily adventures then surrounding them with writing. The wrapper at the top left was from the chocolate in our hotel room.

mini travel scrapbook
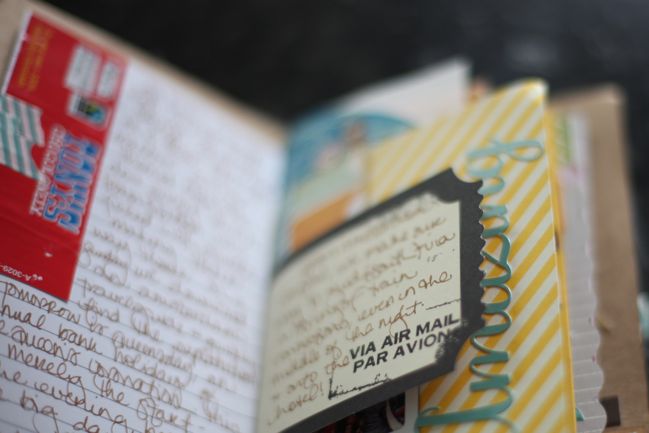
A sheet or pack of small journaling cards goes perfectly for writing along the way… and if you’re really crammed for space you can just keep some journaling cards with you all the time and add them to a book when you get home.

mini travel scrapbook
I like keeping some of the more designed pages as accents – like just adding a woodgrain sticker to the vellum page.

mini travel scrapbook
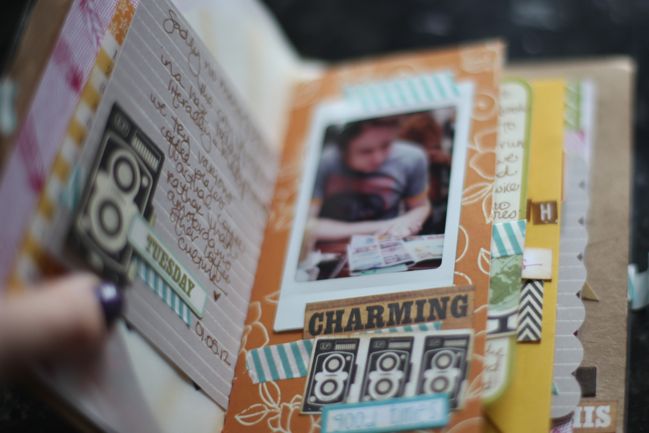
Page design concepts from traditional 12×12 scrapping can still come in useful on tiny little pages… like repeating a motif from one side to the other. The large camera here comes from the sticker sheet while the smaller cameras are part of a border strip. It makes it more obvious that the writing on the left corresponds to the photo on the right.

mini travel scrapbook
Washi tape is a great component to any travel journal kit because you can just stick anything in the book but still have the freedom to move it around later… plus it’s cute enough to use as an accent layer too. So you’ll see a lot of that turquoise striped tape showing up throughout this book, but I love how it’s both practical and a design element with continuity.

mini travel scrapbook
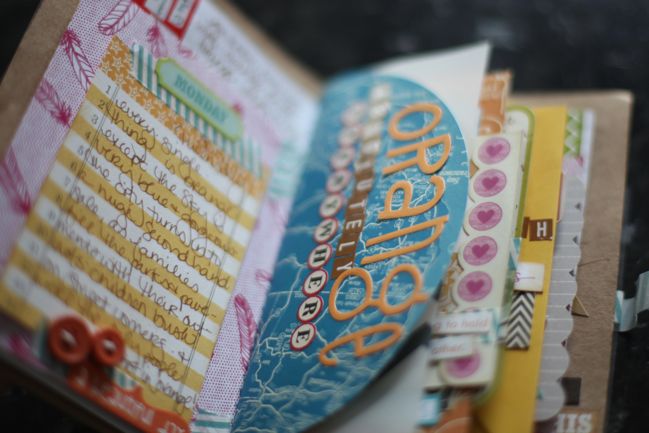
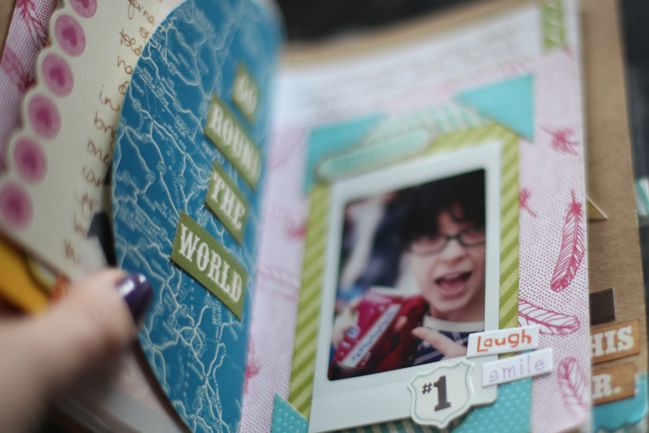
Cutting up border strips with printed phrases can create something new. For the map at the left, I cut out the words from the phrase ‘you make my world go round’ and rearranged to say ‘go round the world’. Because believe it or not, ridiculously super sweet Surinamese/Dutch soda does not make my world go round. (But it does make for a funny story I wanted to include in the book!)

mini travel scrapbook
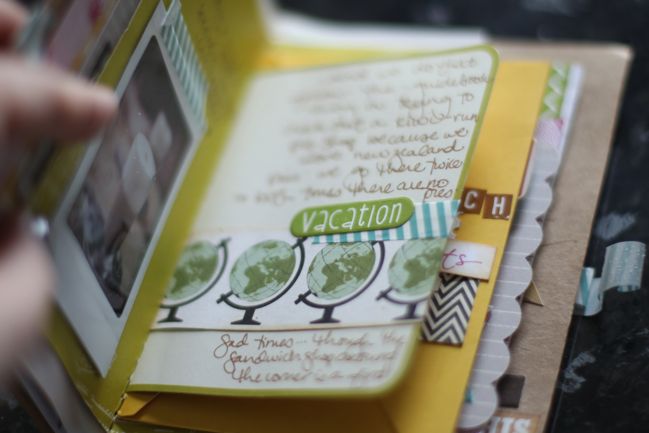
The balance of page sizes and types in this book is just right, so there are pages that look great with just a photo or a phrase, but there are others that include plenty of room to write about the adventure.

mini travel scrapbook
And that’s that!

By the way, you can still grab one of the other kits from Mercantile for May – the main kit is here and there are a few left. I’ll be back soon with a video to show you what I’ve been making with that!

Have a fabulous weekend!

xlovesx

PS: for those of you who have listened to the episode – would you like to see what I keep in my lunchbox for outdoor crafting? I don’t always use this because I tend to just take my basics if I take page kits, but it’s what I carried for years before I committed to packing ultra light!