pretty paper. true stories. {and scrapbooking classes with cupcakes.}

lovely to meet you Twitter Facebook Pinterest YouTube

Take a Scrapbooking Class

online scrapbooking classes

Shop Shimelle Products

scrapbook.com simon says stamp shimelle scrapbooking products @ amazon.com shimelle scrapbooking products @ amazon.co.uk

Reading Material

travel

Best of Both Worlds Kit Category

Sketch to Scrapbook Page :: Putting One Photo Centre Stage

scrapbook page by shimelle laine @ shimelle.com
Moving right along then with the August kit and some long overdue sketches, I came up to a design for a single photo and knew just the thing I had in mind, filed away under ‘somewhat random but still important’ as a story I wanted to include in my backpacking album, all about our midday routine while in Luang Prabang, Laos, which included milkshakes while sitting on the riverside. Yes, I’m scrapping about milkshakes. You’re right, I probably have lost the plot a bit.

scrapbooking sketch by shimelle laine @ shimelle.com
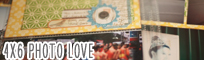
This sketch is designed for a single 4×6 landscape photo with an accompanying story. It’s another design that is purposely meant for those patterned papers you love but don’t want to cover entirely – there is plenty of open space to let a pattern breathe.


Pretty much everything for this page comes from the August Best of Both Worlds kit. I know, I know: it is far from August. I can but move forward! The good news is most of that kit is still in stock and 25% off until Sunday the 5th of January too. I added a sheet of 12×12 kraft cardstock for the background and then the black ink pad of course.

scrapbook page by shimelle laine @ shimelle.com
I know it may seem strange to devote an entire page to one seemingly random 4×6 photo – it’s hardly a beautiful portrait or an amazing bit of scenery. It’s milkshakes of all things. But for me, it makes sense to take the space when there is a particular memory that is important, even if it’s not a traditional milestone. This image represents something that was very important for me to get written down in my backpacking album. There is quite a bit of open space on the page (in the form of the patterned paper) and that gives me two things that will work well for those sorts of important stories: one, if the story hadn’t fit in the space that it did, there is the potential to add more elsewhere, and two, using one pattern with relatively few colours and a repeating design can help direct your eye to the writing and emphasise its importance. It’s not a story tucked away in a corner of a page with lots going on – it has a space all its own.

That said, I had some more random memories and photos that went alongside this story in the form of a divided page protector for the facing page. I’ll share that next so you can see the balance between this more minimal and that one with more stuff in the same space.

scrapbook page by Jill Sprott @ shimelle.com

For a second look at this sketch, let me introduce Jill Sprott with her interpretation in beautiful yellow.

scrapbook page by Jill Sprott @ shimelle.com

This is my kind of sketch! It emphasizes the basics — a photo, some journaling, and a few accents — while also allowing room for interpretation. I sized down the sketch to work with an 8.5” x 11” layout, and reduced the margins around the photo and journaling block a bit. Since there is so much open space in the photo, I added the title to the photo itself rather than below it, and replaced the title block on the sketch with a sunburst pattern (from October Afternoon) that parallels the rays of sunlight in the photo. I built on the blocks in the sketch by adding layers and strips of patterned paper (from American Crafts, October Afternoon, Farmhouse Paper Company, and Studio Calico). Some of the patterns repeat the colors in the photo, while others serve to reinforce the theme of the layout. I also backed the photo with a rectangle of vellum, to add a shimmery quality to the sun-centered layout.

The most important aspect of this page, in my view, is the journaling. It begins with a ‘surface’ view, commenting on the photo itself, but it starts to move beyond that, commenting on the photo as a metaphor for the mindset that I wish to embrace as another school year begins. I usually try to avoid talking about the act of taking a photo in my journaling, since I would rather focus on telling stories or sharing my thoughts and feelings. I want to say more than, ‘So-and-so took the time to smile for the camera.’ In this case, however, the act of taking the photo and what followed from that is part of the story, contributing to the overall meaning of this page.


Jill Sprott lives on Oahu, Hawaii, with her husband, daughter, and their menagerie of pets. She is a high school English teacher, which makes for pretty busy days, but on the weekends, when not grading papers, Jill shifts from working with words to playing with words and pictures, surrounded by patterned paper. Like teaching, scrapbooking is a creative, challenging, colorful, and rewarding endeavor. Jill is currently on the design teams for October Afternoon and Jenni Bowlin Studio, and is a Garden Girl at Two Peas in a Bucket. You can follow Jill on her blog, Use Your Words.

Now it’s your turn. I’d love to see you you interpret this sketch with your own style and stories. As always, this sketch is just for fun and everyone is welcome.


Sketch to Scrapbook Page :: Working with two smaller photos

scrapbook page by shimelle laine @ shimelle.com
Jumping back a little, I have a big stack of pages and scrapbooking videos to share with you over the next few days! Today I’m starting with the video I included as a preview link in the last post – but now it’s here properly so you can also see the finished page and download the sketch to give it a try.

scrapbooking sketch by shimelle laine @ shimelle.com
When I originally drew this sketch, I was on a real kick of printing multiple photos on a 4×6 photo print, and in landscape I prefer the 3×2 ratio to the 4×3, if that makes any difference to you, so that’s what I had in mind when I put the sketch together. Except I did that in the earliest days of 2013, and by the time we got to August supplies, I had moved on a bit and found myself with a big stack of 4×4 photos that really need to be scrapped. Then today’s guest used this sketch for 4×6 prints, so the happy part of this story is that this sketch seems to work really easily with a range of print sizes! Pair two prints with one background paper you really love and don’t want to cover up, and you’re halfway to a completed layout already.


This page was made with just supplies from my August Best of Both Worlds kit, most of which is currently in stock and 25% off, including my ‘Nailed It’ stamp set.

scrapbook page by shimelle laine @ shimelle.com
The 4×6 boxes as slightly messy layers behind the photo isn’t something I had planned when I drew the sketch either but I think it makes a huge difference to the page design. With a page that has plenty of white space, a little goes a long way in terms of small angles and just a few layers. And if you’ve watched the video and realised I said I would add the date and location before I finished and then I didn’t… I did realise the next morning so you can see it there at the top right corner. Things like that make me glad my head is screwed on tightly, or I would leave it on the train.

As far as the title – we made a bit of a promise to ourselves in the last year or so that we would get in the picture more often. Sometimes it works really well! Other times it is not quite awesome. This particular day I imagined some amazing pictures but in reality, it just wasn’t going to happen. The Boy made silly faces. I told him he could keep making silly faces, I would scrapbook them. I’m just keeping my word as a wife, clearly.

scrapbook page by Rachel Hull @ shimelle.com
For a second look at this sketch, let me introduce Rachel Hull with her interpretation in another pretty blue floral!

scrapbook page by Rachel Hull @ shimelle.com
I love following sketches & this was a great way to get back into scrapping after having my daughter. The kraft backing and photos were easy to select and then I slowly built up the embellished areas with stickers, washi tape, ribbon and punches and layered a project life card over a simple office tag for my journalling. I have been scrapping for over five years now, and whilst I don’t always get as much time as I used to, I like to keep on top of my Project Life album. However 12×12 pages will always stay close to my heart and I will always fit them in when i have time as I find them much more enjoyable.


Rachel currently lives in Leeds with her husband Rob and brand new baby daughter Martha, she has been scrapbooking for several years and divides any free time between scrapping and knitting. She runs her own blog, Rewarding Memories, including notes on plenty of crafty endeavours.

Now it’s your turn. I’d love to see you you interpret this sketch with your own style and stories. As always, this sketch is just for fun and everyone is welcome.


Best of Both Worlds :: My Scrapbooking Product Picks for January 2014

Best of Both Worlds Scrapbooking Product Picks for January 2014 @ shimelle.com
Welcome to a new year of Best of Both Worlds – my humble version of a scrapbooking kit! If you’re new to this idea, the name ‘Best of Both Worlds’ comes from the set up. If you want the ease of a kit, you can have it: on the first of the month, I share a list of supplies that I love together, and you can simply add one of each to your basket and check out your order – super simple. But a kit with a subscription doesn’t work for everyone – maybe you would use or can afford a kit some months and not others, maybe you already have a few of the items in the kit or would prefer something different that makes paying for kit items you don’t want less than ideal. If so, this can really help, because there is no subscription and you’re free to use the shopping list as a guide, adding more of what you like and not bothering with the things that aren’t your style. Hence the ‘best of both worlds’ moniker!

And with that, let’s get on to the kit for January 2014! Right now is a great time to go shopping, as there is a massive 25% off sale in the shop for the next few days, so I’ve been able to pack more into the kit than usual. For January, I wanted to mix warm neutrals (like woodgrain, of course) with a rainbow of happy colours to brighten up the short winter days. There are products from October Afternoon, Simple Stories, Fancy Pants (yes, that fancy paper is die-cut in the centre), Studio Calico, Pebbles, American Crafts, and one new addition made just for the kits: new Best of Both Worlds flair badges made by Two Peas.

Click here to shop the January Best of Both Worlds product picks!

Best of Both Worlds Scrapbooking Product Picks for January 2014 @ shimelle.com
Paper a-sides and b-sides.

I am really enjoying texture on my pages at the moment and wanted to include a few different finishes in the embellishments. The pack of chipboard stickers from October Afternoon is literally one of the best scrapbooking products to hit my desk in months. The colours are rich, the pieces are a good size to add detail without overwhelming the photos, and the chipboard is great quality. The woodgrain chipboard letters are that same quality, and the flat green letter stickers actually include two small alphabets in the pack – one with individual script letters and then another in the same colour that is small blocks with the letters on each tile. The washi tape is a different texture and this design is one that could be used for so many things. Plus there are wood veneer and plastic pieces, so there is a real variety. I haven’t added any gems or enamel dots to the kit this month, so if that’s something that has become integral to your finished pages, you might consider a rainbow pack to match.

Best of Both Worlds Scrapbooking Product Picks for January 2014 @ shimelle.com
And then this new bit of fun! Some flair! These are all individual pieces like all the Two Peas flair, so you don’t have to have them all and can just pick the ones that would work for you. (You can get them all though, of course! Go right ahead!) When you click through to the shopping list, you can see the individual pictures of them, so don’t be alarmed by the reflections here in a quick little snapshot from the production line! (The plan is for the Best of Both Worlds badges to be a regular thing every month, but what with today’s earlier announcement, I’m not making any promises about that, just in case!)

Click here to shop the January Best of Both Worlds product picks!

If you need to bring the price down, the stamp set is the most expensive item. It is 25% off its full price currently, but if you don’t stamp, then of course the bargain doesn’t matter!

The shipping discount code for January is 5SSYWX. That will give you a discount on shipping if you have $50 of physical product that is not on clearance (‘phase out’). Most of the 25% off items are not on clearance, just on sale, so they count toward your $50 total.

Everything is first come first served – once it is in your shopping cart, it is not reserved and can disappear if the item sells out, I’m afraid. Two Peas has started restocking items in the kit when they sell out, but obviously when the sale ends, those restocked items would no longer be at the discounted price, so now is a good time if you’re up for shopping!

One thing I mentioned briefly in today’s earlier post was that there will be extra ideas for using the Best of Both Worlds kits this year: each month a guest designer will be joining us to share what she makes with the supplies. In that true good-idea-but-not-quick-enough style of mine, this month’s guest’s kit is currently making its way from Two Peas to her home! But I love what she makes so I have a feeling her projects with these supplies will be fabulously fun… and just a different look to what I’m making with mine! And for mine… yep! I’m scrapping with this too and will be sharing that here throughout the month. (Speaking of which, I’ve been on a huge video editing spree to catch up with all the things I haven’t yet shared here. I think there have been enough blog posts here today so I’ll just give you a sneaky link to one video here, and the corresponding blog post can be for tomorrow, yes? I’ve also been drafting up a big guide that has all the 2013 kits and all the pages I made from them in a nice, easy-to-see format, so I should have that ready to share with you shortly too. It’s a lot of pages even before I got behind with sharing, so seeing it all together boggled my mind a little!)

I have my first page from this kit ready to share with you tomorrow, so do stop by!

And thank you so much, from the bottom of my heart, for all your sweet messages today. I have felt about a million feet tall reading them all, even if I’m most comfortable curled up on the sofa! I cannot say thank you enough.

Sketch to Scrapbook Page :: Showcase a photo with borders

scrapbook page by shimelle laine @ shimelle.com
Two videos in two days? It’s a start, at any rate. If you’re not off watching Doctor Who, you can watch a bit of Sketch to Scrapbook Page craftiness! (It’s also acceptable to watch this after The Doctor saves all space and time yet again. I’ll allow it. Just the once.)

scrapbooking sketch by shimelle laine @ shimelle.com
Sketch thirty-one is designed for a single landscape photo (most likely a 4×6 print, but other sizes could work easily) and has substantial space for writing too. The vertical border strips beneath the photo can be paper, tape, ribbon, die-cuts, fancied up with a border punch, or whatever you fancy really.


I know the calendar will argue with me, but the supplies for this page are from the August Best of Both Worlds kit. (I said it’s a start!) Everything is back in stock with the exception of the aqua star paperclips, should you fancy anything for your own crafting.

scrapbook page by laura kate @ shimelle.com
For a second look at this sketch, please welcome Laura Kate with her interpretation adapted to a page in her Project Life album.

scrapbook page by Laura Kate @ shimelle.com
To me, this sketch seemed like it would best fit in a single pocket rather than across a whole pre-divided page. Adapting a 12×12 square sketch to a 4×6 rectangular might seem weird, but I often have little square Instagram photos and the ways I add them in have gotten a bit samey. As you can see, I turned the sketch a bit to aid in the horizontal flow of the card and worked with the b/w theme already in my PL spread to document a fun event we attended that made up the bulk of this PL page (using a great shot of the drinks snapped by my husband!). It was a bit of a challenge to figure out how to make this sketch work, but I really love the end result!


Laura Kate is a teacher, crafter, ex-pat, erstwhile musician, kitchen dabbler & lover of Blythe dolls. A scrapbooker since 1993 – starting with an awesome Lisa Frank album – she writes about all her exploits on her blog, tries her hand at designing some products, and occasionally remembers to update her Etsy shop with her doll fashion creations. Laura Kate lives in London with her husband and 4 fancy goldfish.

Now it’s your turn. I’d love to see you you interpret this sketch with your own style and stories. As always, this sketch is just for fun and everyone is welcome.


Best of Both Worlds :: My scrapbooking product picks for November 2013

Best of Both Worlds Scrapbooking Kit November 2013

I know from the looks of things here, you wouldn’t guess I’ve been making a big stack of new stuff to share with you, but I really have! I’m really looking forward to truly being back in the swing of things as a blogger with plenty of projects, tutorials, and videos throughout November and onward. Now I need to take all those projects and get them translated into blog posts and get all those edited videos uploaded to share with you! Obviously.

Since it’s the first of the month, I’d love to share my November product picks with you, and I’m delighted to say you really will be seeing how I go from kit to finished projects with these products in a nice timely manner (along with with projects from the remaining earlier kits, in clearly what is not a timely manner, but I still want to share them with you). This is what I’m scrapping with right now. (Well not right now. Right now I’m typing. But when I’m not typing. Also when I’m not eating pumpkin pie. Because I’m not very good at typing while scrapping and I’m even worse at eating pie while scrapping. Therein lies disaster, I tell you.)

Click here to shop the Best of Both Worlds Scrapbooking Kit for November 2013.

This month, I’ve gone with autumnal notes in the form of woodgrain and stitches, but with a turquoise twist on the usual mix of browns, yellows, and oranges. When earth tones were a very big trend in the scrapbooking world, I made more than my fair share of very, very brown pages, and when I look back at them, I’m still happy with the designs, even if they are dated, but the overwhelming sense of brown makes even the happier memories seem sad at first glance. That very limited colour scheme just doesn’t work for me, and yet I find the colours of autumn really beautiful! I’m sure that’s because in the real world outside my scrapbooking supplies, I see those lovely autumn leaf colours against a background that includes blue and grey skies, green grass, and the odd colourful shot of a late-blooming rose. I’m a terrible gardener so I’m very thankful to live in a neighbourhood with more talented people for that and I can just look from a safe distance! But it’s those shots of colours that make the autumn colour scheme really work for me, so that’s what I was after with this kit. I hope you like it too, of course! I also really like that turquoise is a colour that works easily for boys or girls, and it can be casual or more formal depending on what you put with it. Same goes for the bronze color shine mist!

As always, you can shop the kit to suit you. I love that big woodgrain stamp and have been using that for a few months now, but if you don’t use stamps much, that’s a quick way to reduce the price of the kit. If you tend to do double page layouts, duplicate some of the papers to make that easy for you. And if the motifs, fonts, or colours don’t work for you, you can always make a change.

Click here to shop the Best of Both Worlds Scrapbooking Kit for November 2013.

Also, while we’re talking about kits, a word to those who have made a deposit for a Christmas in a Box kit (either UK or rest of the world): I’m just finishing a few final steps on that and will be sending emails to everyone this coming Monday with all the info you need! Thanks so much.

Have a great weekend, and happy scrapping!

A quick note about October's Best of Both Worlds scrapbooking kit

scrapbooking supplies
Morning! I have a video coming up later today to explain all this with the supplies and so forth, but in an effort to not keep you waiting if you just want to get shopping… a little update on Best of Both Worlds!

As you may have figured out from the launch of the new workshop, Glitter Girl has totally stolen all my scrapbooking time for the last couple months and it’s put me dreadfully behind in using my last two Best of Both Worlds kits. I want to catch up on that, and I know many of you would prefer not to buy a new kit until all those projects and videos are shown here. But there are also some of you who scrap more on your own (also awesome) and are ready for a new kit! I’ve tried a little compromise!

Most of the September kit is available and can be purchased here.

For October, I’ve selected things from the autumn sale at Two Peas, and that can be found here.

The shipping discount code for October is 5ZZKRD. Right now, that code gets you a discount for spending just $35 in physical, non-close out goods, rather than the normal $50, but I’m not sure what the end date is on that offer. I’ve tested it today and it’s working on my cart. Keep in mind the October kit goods are all on close out, so they wouldn’t count toward your $35 total, but you could add items from the September kit or your favourites from brand new collections like Amy Tangerine Cut & Paste, Dear Lizzy Polka Dot Party, or all the new Echo Park to take you up to the $35 needed.

I’ll be back with more later today… once Glitter Girl is done with my time again. Sheesh she’s demanding!

Best of Both Worlds :: My scrapbooking product picks for September 2013

Best of Both Worlds Scrapbooking Kit September 2013
Often in the scrapbooking world, papers turn to browns and oranges and other autumnal colours from the first of September. It’s the first of September here and it still feels like summer, and indeed it is still technically summer till the 22nd of September in this hemisphere, so instead of switching to all things autumn, I wanted to put together one bright blast of colour to end the summer. Sound like a plan? With a bit of luck, I won’t have autumn photos to scrap until October anyway!

Unfortunately I left it a little too late to make up my mind on all the goodies for this month since the new stuff started to arrive in the store, and that means my box is still on its way here. I can’t make a video sharing these products together just yet! But I love all the colour plus black and white accents, and I hope you’ll enjoy scrapping with this set of supplies too.

Click here to shop the September 2013 Best of Both Worlds Scrapbooking Kit.

Best of Both Worlds scrapbooking kit September 2013
There are bright, colourful new papers from My Mind’s Eye, Bella Blvd, and Glitz, plus some colourful enamel dots. Then the accents are in black and white from Teresa Collins, Skipping5, Rhonna Farrer’s latest My Mind’s Eye collection, Glitz washi tape, and a new flair badge made in-house at Two Peas. But there are a few things to take note before you check out your cart…

…There are no letter stickers listed in this month’s kit! Shock! Horror! That’s because this month I want to focus on using black letter stickers. If you have plenty of black letter stickers in your collection, you’re all set and you can use September’s kit to encourage yourself to use them! If you’re lacking in black letter stickers, then pick a pack! There are plenty in the store, and you can find just the right set for your style and budget.

…If you feel some of the die-cut cards are too swoony in the wording for your liking, you can either swap for others you like better, or keep these and know you’ll be working with them for the colour and pattern rather than the words, so you’ll cover up those words if they don’t fit your page. Easy!

…The stamp set I added to the list this month is one I’ve had for several months, but I want to make sure I use more. You could elect to choose your own set of stamps from your own collection with that same ethos – have a flip through and see if there is a set you meant to use many times but haven’t really used all that much. Or if you want something new and want to grab a bargain, there are some great stamp sets that aren’t very old at all that are 50% off in the store right now, so take a gander here to see if something catches your eye while it’s a great bargain. My plan is lots of stamping in black ink to work with that bright colours + black and white accents approach.

…The images in this post are not to scale!

…Adhesives are currently 25% to 50% off. Great time to stock up on pop dots of course.

Best of Both Worlds scrapbooking kit September 2013

As always, all the projects I’ll make with my September kit (once it arrives) will be shown here on the blog totally free of charge. These will always be free, though not amazingly timely, as those of you who read here will know I have lots of August kit projects that need to appear here on the blog! (Yes, they will shortly.) I also have several paid workshops of various styles coming up, and wanted to both clear that up (I don’t use the Best of Both World kits in paid content, just the free stuff you find here and on my YouTube channel) and also give you a little advance warning should you want to follow along with one of those upcoming paid workshops with the same supplies that I’ll be using. One of the projects I have coming up soon features using the Glitz Wild & Free collection pack from start to finish. All collection packs – including that one – are currently on sale for 25% off, so that’s a great bargain on a brand new kit. I have no idea how long that discount is valid, I’m afraid. If Wild & Free isn’t your style, the project that features that collection kit could be used with any collection kit of your choice, so take a look at the complete list of options if you prefer. But just to make that really, really clear – that is a paid workshop and I will not be sharing the projects I make from that collection kit here on the blog. (Any questions, let me know, but I think that should make sense.)

Okay, I think that is most of the important info for Best of Both Worlds in September! You can find the kit here and add it to your cart. The Best of Both Worlds idea is that you’re free to make any changes you would like, so add more or take things away or swap for similar items that are more your style – whatever you prefer! If you purchase at least $50 in physical, non-phase out goods, you qualify for free shipping to US addresses or $5 OFF shipping to anywhere in the world. {ETA: I am SO sorry that I made an error there and originally made it look like $5 international shipping. $5 off. $5 off. I am so sorry!!!! It was just a typing error, but oh goodness what an idiot I am not to have caught it.} You will need to enter the code ZWPKWA for the shipping discount. International orders, you may find the shipping quote is higher than the actual postage price on your box when it arrives. If that’s the case, open a customer service ticket to request a refund of the excess – just to be sure you open the ticket within thirty days.

Thanks so much for your continued support, and happy scrapping in September!

Two Tutorials :: No-Sew Collar and a Floral Scrapbook Page

The no-sew collar by Alice Partridge @ shimelle.com
Two Tutorials is a series with two step-by-step craft projects: a non-paper project by Alice followed by a scrapbooking project by Shimelle. You can see previous posts here for further details. We hope you enjoy!

Every now and then we all look through our wardrobe and feel like it needs a bit of a lift: your favourite garment needs updating or maybe you wish you had more accessories! Well, look no further – this little simple collar is easy to make and perfect for customising any garment you wish. With free reign of fabric and embellishments, it can be made to suit you!

The no-sew collar by Alice Partridge @ shimelle.com

For this you shall need the essentials, such as scissors and pins. Then your chosen fabric, ribbon, embellishments and most importantly, collar template! There are plenty floating around on the internet you can use and this tutorial can suit all shapes. (Have a look here for a variety.) Because you aren’t sewing the edges of this collar, check to make sure you choose a fabric that doesn’t fray. (The no-hem tactic is what makes this ‘no-sew’ in my book. There may be a few stitches to come, but you can sew on a button, right?)

The no-sew collar by Alice Partridge @ shimelle.com

The no-sew collar by Alice Partridge @ shimelle.com

Place your collar template on the fold (P.O.F) and cut carefully around. Don’t remove the template until your happy with the shape. Also, you don’t have to use pins, you could draw around the shape with a fabric pen (one that washes off) or tailor’s chalk – you will still get the same shape whatever you use.

The no-sew collar by Alice Partridge @ shimelle.com

When you open it up, it should look like this. At this stage I ironed it out and tried it out for size. Next step: Ribbon!

The no-sew collar by Alice Partridge @ shimelle.com

The no-sew collar by Alice Partridge @ shimelle.com

I cut 2 pieces of ribbon, 32cm in length and placed the ribbon underneath the collar (as shown). I put 2cm of ribbon under each side and pinned in place. To hide the stitching you shall do for the ribbon, I decided to sew them with a button and it made it look a lot neater! It’s up to you which type of button you use, one hole, four holes! I used four holes, so it was all much sturdier.

The no-sew collar by Alice Partridge @ shimelle.com

How easy was that!? There you have it, the no sew collar with a big impact. You could easily make a ridiculous amount of collars and have one for each day of the week. I get excited just thinking about how many fabric and embellishment combinations you could use! I hope you’ve enjoyed this tutorial and will join me again next week.

scrapbook page tutorial by shimelle laine @ shimelle.com
Taking inspiration from Alice’s project and heading to my paper this week gave me a little something at the start and a little something at the end of the layout! To start, I was taken by how the full piece of fabric in Alice’s project looked quite different to the pattern shown in the finished collar, and thought I might use this idea to make use of some patterns that wouldn’t necessarily be my very first choice. I started with the new Jenni Bowlin fishnet stencil, plus some white cardstock and grey spray mist.

scrapbook page tutorial by shimelle laine @ shimelle.com
With a few sprays, I ended up with this look. I sprayed too close to the paper in the centre, resulting in that section where the pattern isn’t at all clear. Easy to remedy with another try, but I didn’t worry about it since I was pretty sure the photo would cover it in the finished design.

scrapbook page tutorial by shimelle laine @ shimelle.com
I trimmed that down to the square (I like the frame that the edge of the stencil created, so I left it intact) and cut a larger box of paper in a brighter colour (High Five paper by Elle’s Studio)…

scrapbook page tutorial by shimelle laine @ shimelle.com
…and layered those two in the top left quadrant of a background patterned paper (Mix Tape paper by October Afternoon) that included both those colours – the neutral grey and the bright aqua.

scrapbook page tutorial by shimelle laine @ shimelle.com
Sticking with that same bright colour so far, I added droplets of ink following a loose horizontal path across the page, around the midpoint of the patterned paper block. I used metallic ink here but non-metallic for the grey at the beginning so it wouldn’t be too much sparkle overload, especially considering I already had the super glittery letter stickers waiting on my desk.

scrapbook page tutorial by shimelle laine @ shimelle.com
Next I added a series of blocky elements to fill the bottom half of the page. I started at the left and worked right, letting some element of each card help choose the next. The first card was inspired by Alice’s design, as the flowers looked like a collar to me (vaguely!) and the colour of the leaves was a great match for the mist and the patterned paper so far. The next block to the right is a Dear Lizzy sticker, chosen because the flowers here shared a similar look and colour. These two florals together strike me somewhat as two different artists interpreting the same bouquet, if that makes sense? The style of the illustration is different, and yet they both have similar colours and shapes repeated through the blossoms. The final block to the right is an Amy Tangerine sticker, chosen because the colour was a good match for the colour in the Dear Lizzy flowers.

scrapbook page tutorial by shimelle laine @ shimelle.com
Wanting to take that one-linked-to-the-other concept and move it to other areas of the page, I added the photos and topped the corner with a larger floral sticker from the same Dear Lizzy sheet, with the matching flowers.

scrapbook page tutorial by shimelle laine @ shimelle.com
Smaller stickers can be very useful for covering up any ink drops that didn’t wind up quite so aesthetically pleasing as the others!

scrapbook page tutorial by shimelle laine @ shimelle.com
If the trapped white space between the photos and the cards made you nervous, you can breathe now. That space fit the title, with the super sparkly Maggie Holmes Thickers, plus small letter stickers from the Dear Lizzy sticker sheet.

scrapbook page tutorial by shimelle laine @ shimelle.com
Even with the title in place, there was some trapped space that needed help. Border stickers were useful for filling the space to the right of the title and also just above of the small letter stickers.

scrapbook page tutorial by shimelle laine @ shimelle.com
Then I filled in the journaling card, and got so carried away that I apparently thought the word ‘all’ had three Ls, so I may have tried to turn one into an exclamation point. Can’t contain the excitement! (I guess.)

scrapbook page tutorial by shimelle laine @ shimelle.com
Then for the finishing touch to match Alice’s project: some button and twine detailing to that loop of flowers. I tack the buttons in place with normal adhesive while I punch the holes and stitch them onto the page. If you hate sewing buttons on, then glue dots will hold them really well, but I like my buttons to have string through them, and sewing through glue dots is just more trouble than it’s worth, I think.

scrapbook page tutorial by shimelle laine @ shimelle.com
Baker’s twine is a pain in the neck to thread through a needle. Either you have to use a giant needle, have the patience of a saint, or be very careful with a threader, else the baker’s twine will split into the two different colours and one will feed through the needle and the other will stay on the other side. I didn’t have too much luck using threaders with this, even with reasonably sized needles, and have found washi tape to be far easier. Run a bit of tape over the end of the twine and press it against itself so there is no sticky left. Then take your scissors and cut it into a really skinny triangle so the washi tape has a point that can go through the needle, but the twine is still sandwiched between the ends of the tape. Pull that through the needle, discard the tiny bit of tape, and you’re all set.

scrapbook page tutorial by shimelle laine @ shimelle.com
Buttons stitched in place, then thread tied into a cute little bow to mimic the collar! Of course this could also be done with ribbon, but I didn’t have anything that was a good match. I wished I had a lush yellow satin ribbon for a very pretty bow! Maybe next time.

scrapbook page tutorial by shimelle laine @ shimelle.com
Here’s my finished page for this week’s project! Supplies, apart from the twine, mists, and mask, are from the August Best of Both Worlds kit.

That’s it for this edition of Two Tutorials! We’ll be back most weekends with a new pair of step-by-steps, so if there is a craft or technique you’d like to see, let us know and we’ll keep it in mind. Happy crafting!