

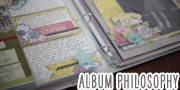


5 Ideas for scrapbooking with printables


Today I’m happy to introduce Louise Fortune as a special guest blogger. She has five fabulous ideas for crafting with printables – great ways to add new designs in just the style you want by using your home printer.
Printables are one of the most versatile scrapbooking products to have in your crafting arsenal. It doesn’t matter if you are a died in the wool paper only scrapbooker or if you dabble a little in the hybrid, printables can be a untapped resource especially as there are some great sites offering a huge selection (try here for a start) not forgetting the scrappers to numerous to mention, who offer great freebie versions of their designs. A whole page can be created from printable products without even moving from your scrapping space from papers and journalling cards to embellishments and accents.
The card above features one printable design – it’s a great printable and amazingly simple to use. The stand alone design could be adapted to use in a mini book – I’m thinking JYC here girls – as a printed background on a seasonal layout or as is intended on a card.
Although clean and graphic in looks it the overlapping type gives it a lively feel. The colours are simple enough that it could be matted (wow! I haven’t used that word in a long time.) and then added to a patterned background without it looking too busy.
Once printed onto your card blank all it needs is a pretty matching ribbon on the side, voila ! bespoke Christmas card. I used a 5 ×5 inch cream card blank for this design.
Two tips to help get the most from your printable design: Remember to adjust the paper settings on your printer for card to get a nice deep crisp ink resolution. If you want the design smaller or larger, adjust the scale settings (percentage) from your print preview screen.
This design is available free from Scrapbook Printables. Find it here and print at any size you fancy.

I love, love, love this design! My inspiration for this came from my favourite American coffee shop (you know who you are!) discontinuing the cherry chocolate christmas drink this year. I decided to create my own version and as I have friends who miss their seasonal cherry, choc, coffee beverage too I decided to do a few gift mugs, this tag with the instructions finishes off the package perfectly.
One seasonal mug, three sachets of cherry chocolate mix and a generous helping of mini marshmallows, wrapped generously in clear film and tied with sheer ribbon and the tag, one fast, thoughtful, designer, handmade gift.
I used a standard manilla luggage tag from a stationary store (WHSmith, Staples or Paperchase) printed the design off onto white card and then adhered it to the tag.

To create this gift bag I downloaded a template from the web, there are hundreds of options out there. This one fits perfectly onto an A4 sheet of paper and makes a 6×3×2 inch bag (approx). Choosing which paper to download and print is the only difficult option with this project there are SO many available and as you get to pick the design it can be tailor made for your gift and the occassion.
This one is obviously seasonal and I used this free snowflake design available here. The paper design is printed on one side and then the paper was put back through the printer and the template was printed on the opposite side.

As this scrapbook page is about a city break, I used Shimelle’s travel journal printable, but instead of creating a book with it I used it as a background and a journalling option for my LO. It is printed on kraft cardstock and then the design is left whole, trimmed to a 1/4 of an inch of the outside edges and then adhered to the cardstock.
I wanted the journalling to be read, and I hand wrote it, which is rare, so I want it accessible! A trading card protector sheet was trimmed down to 2×2 pockets and fixed to my page with brads over the travel log. on the back of the photos I adhered a street map of Dublin, but you could opt for four more photos to make it an 8 photo layout. finally I added a manilla tag printed with some details and a rub on clock face and a strip of American Crafts travel paper.

This scrapbook page uses a bunch of printable journalling cards. They serve two functions here, as a journalling option but also as a design element, creating a great undulating border across the photo. These were created using the speech bubble option in shapes on my word processing package, I changed the outline to dots adjusted the size and then printed them out onto graph lined card.
The only tricky bit was cutting them out by hand, not my strong suit! I added a wide strip of patterned paper behind the photo a small printed red tag to the top edge to tie in the red on the journalling tags and a title cut out on my Cricut die-cutting machine. I ran a few of the cut out speech bubbles back through the printer to add the lettering.
Do you have any projects with printables you’d like to share? Leave us a link in the comments and share the printable love!
Thanks for joining us Louise!
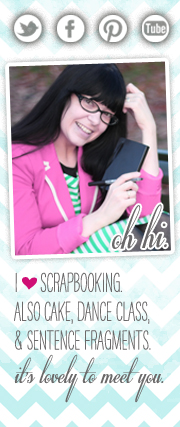
| Louise is a 40 something work from home Mom, her professional background is in graphic design, her hobbies are all creative, as long as you don’t count chocolate eating. Since writing her first travel journal at 13yrs old,she has always scrap booked. Documenting and photographing the events that make up her life along with the associated ephemera. Louise recently entered the blog world where she randomly rambles on about life and her creative pursuits or lack there of and occasionally shares her various typographic designs. |
 |
![]() Read more about:
Read more about:
Next post: Notes from Ayutthaya Thailand
Previous post: Winner!