


DIY Embellishments:: A Scrapbook Tutorial by Ann Schneider

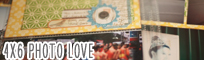
I have a lot of patterned paper. Who doesn’t, right?! Well, I have an overwhelming tendency to buy tons of paper and when I start a layout, I love to layer that paper and build my page. Which is all good and fine, but usually something is missing. Something to take my layout to the next level. I need an embellishment. But I only have a billion sheets of patterned paper sitting on my desk. Hence, this is where I start making my own embellishments out of my collection of patterned papers. This is where my beloved prize ribbon was born! Easy peasy!

Use your scissors (or some sort of cutting tool) to cut your favorite patterned paper into two 1/2 inch wide strips.

Next cut those (2) strips in half so you’re left with 4 strips measuring 6 inches in length by 1/2 inch across.

We all made those chain hoops as a child. Let’s do it again. This is where I used washi to form my circle. Use any other tape or maybe glue, if you’d like. Just don’t form that chain we like to make at Christmas. That’s not part of our master plan!


Ok, grab the larger circle that you have cut out. This is our base. Pick up one of your loops and pinch it in the center and staple it onto the large circle. Repeat this step in a clockwise fashion until you form the flower portion of the prize ribbon.


That small circle I had you cut out? Pull it out now and put a brad through it. Maybe glue or sew a button through it. Glue it to the top your prize ribbon. I used two extra strips I had left over to create a tail if you will, to hang down from the flower portion. I even threw in a scrap of ribbon. Thus, creating a prize ribbon worthy of a layout or a card!

Be creative! Use different patterned papers to create this. Mix it up! I love to make a prize ribbon using fabric and ribbons. I’ve made several through the years as hair decorations. Oh, they’re so pretty!
Well, I hope this inspires you to pull out your patterned papers and cut them up to use for embellishments! It’s a great way to use up your stash!
| Ann Schneider lives with her family in Rochester, NY. She and her husband, Craig, were high school sweethearts who married in 1999. They had their first daughter, Nora, in 2004. She was followed shortly by another daughter, Charlotte, in 2005. She started scrapbooking in 2005 as a way to capture the fun and crazy life she was living with two babies 15 months apart. Ann is a former bookstore manager who still reads every day. She loves being crafty and volunteering. She has been published in Scrapbook Trends. You can follow her at her blog Pinky and Sisters and check out her gallery at Two Peas in a Bucket |  |
![]() Read more about:
Read more about:
Next post: Five Ideas for Scrapping with String by Robyn Werlich
Previous post: Best of Both Worlds :: My scrapbooking product picks for July 2013