Sketch to Scrapbook Page :: A design for photo booth strips
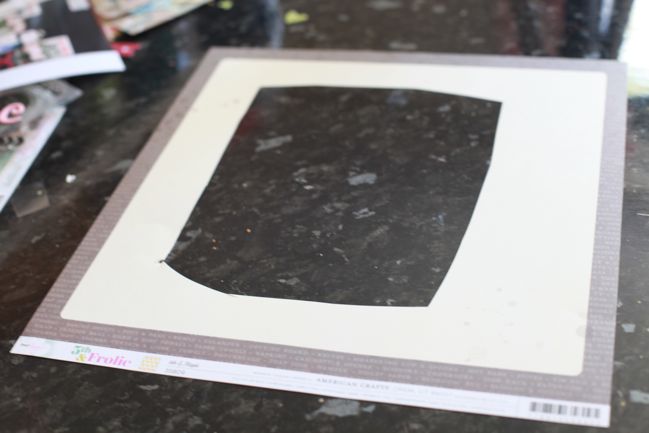
I’ve had a few discussions recently about something known by the delicate name of ‘paper gutting’. It’s rare that I show paper gutting in my videos, because I don’t think it makes very riveting viewing and I had – wrongly perhaps! – assumed if you wanted to gut your paper you were already on top of that and didn’t need me to show you what that was.
It turned out there were a few of you left completely confused when we discussed this on the Paperclipping Roundtable, so this week I wanted to share the simple process of paper gutting so you don’t find yourself with such a sharp intake of breath the next time I layer two papers on my page to show just a quarter inch border of your favourite patterned paper of all time.
Just cut a big section out of the middle and leave the edges intact. You can use a trimmer and make it all nice and tidy; I tend to opt for quick and untidy by using scissors. It doesn’t matter, since you’re going to cover it up anyway!
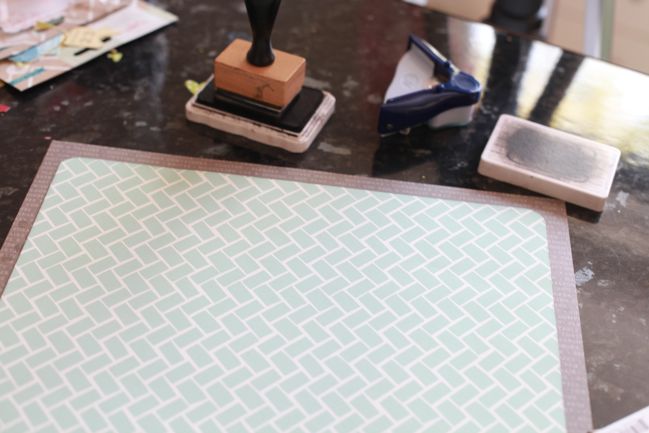
Then place your smaller-than-12×12 paper over the top and adhere around the edges so you’re not just gluing that top sheet straight to your table. Presto: the glory of the second colour peeking around the edge of the page without the heart attack of using a full 12×12 sheet for it. If you’re scrapping on a budget or trying to get the most from a kit or you just love a paper but only have one sheet of it, this can come in terrifically handy so you can add embellishment or photo mats in the same pattern as your outside frame.
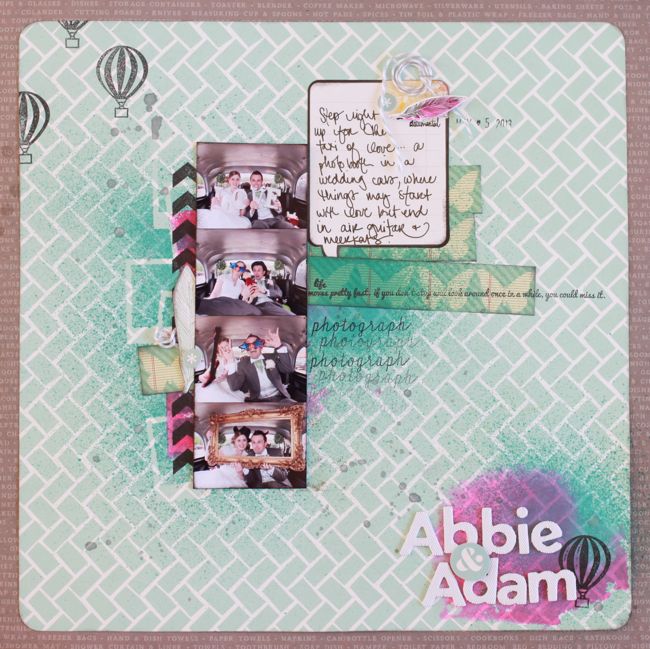
But then all measure of sensibility went out the window and I put together something entirely devoid of the idea of neat and tidy. I really wanted a splash of bright colour, and this seemed to be one way to get it: hot pink ink applied to the page with the acrylic block rather than a stamp. Everything here aside from the inks, mask, and twine is from the May Best of Both Worlds kit. I’ve actually already scrapped these photos in black and white for the wedding album, but I had them in colour too and wanted to give them a try with a messier look. I’m not convinced with the stark black and white of the journaling block, but there are other details I really like and want to rework on future pages too.
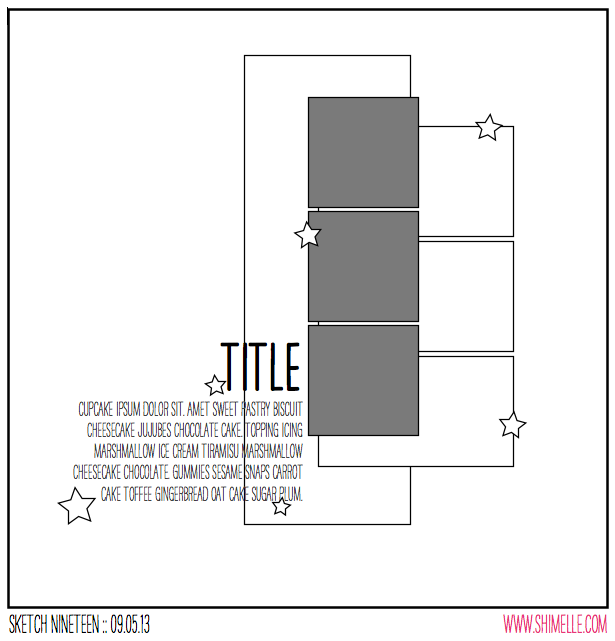
This scrapbook page was inspired by this sketch, which is perfect for a strip of pictures from a photo booth, but could be small photos of any subject or indeed one taller, thinner photo, which I also gave a try.
Sadly I got a bit ahead of myself when I said there were two versions plus a guest. No guest today, I’m afraid. Just a one-off, and I’m sorry for the mis-statement in the video.
Again the supplies come from the May kit, and I’m thinking this page will really feel more finished with some machine stitching, but I can’t add that till next week. Right now my machine is completely inaccessible while we build some furniture! But this sketch is a bit of a departure from my normal page process and it shows in both versions.
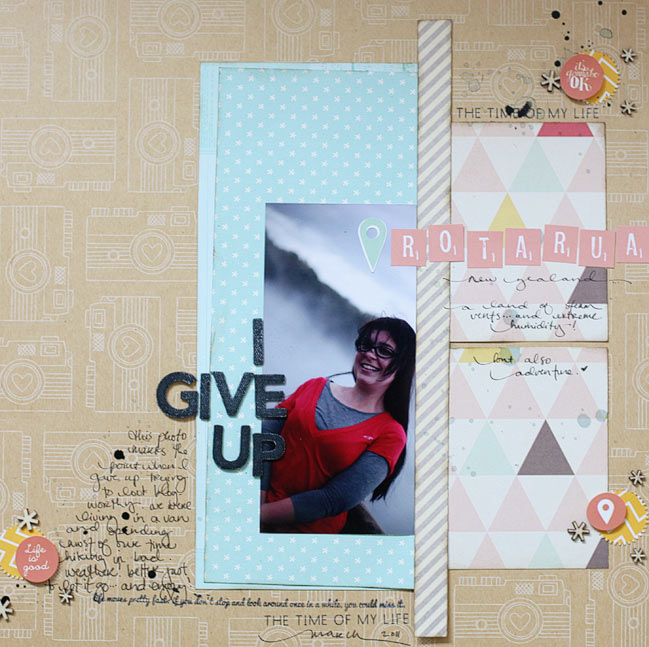
I can’t tell you how many times I have picked up this photo to scrap it then put it back. It’s so not flattering. And I very specifically remember how I felt that day and that was anything but flattering too. This is from our New Zealand adventure, living in a bright orange van, and my hair was a state, my clothes were a state, and for a few days I just decided to not care about it any more. It wasn’t a permanent thing, even while living in the van, and about a week later I went to a different extreme and bought scissors and hair dye for a campsite makeover whilst The Boy was spending his days scuba diving beautiful ship wrecks. But I decided the story would win out and I would go ahead and get this in my album, unflattering photo and all. Who knows: this may be like when I look at photos from my high school yearbook and wish that I had appreciated my teenage look rather than telling myself I was a total mess. Maybe not that extreme, but a bit of reality, anyway.
Now it’s your turn! I’d love to see your interpretation of this sketch!
![]() Read more about: sketch-of-the-week best-of-both-worlds-kit
Read more about: sketch-of-the-week best-of-both-worlds-kit
Next post: Five Ways to Show off those Special Moments by Naomi Atkins
Previous post: Making The Most of Your Digital Product:: A Scrapbook Tutorial by Lea Lawson


