pretty paper. true stories. {and scrapbooking classes with cupcakes.}

lovely to meet you Twitter Facebook Pinterest YouTube

Take a Scrapbooking Class

online scrapbooking classes

Shop Shimelle Products

scrapbook.com simon says stamp shimelle scrapbooking products @ amazon.com shimelle scrapbooking products @ amazon.co.uk

Reading Material

travel

online scrapbooking weekend Category

Scrapbooking Embellishments :: Journal your Christmas Page Numbers part one

page numbers for journal your christmas online scrapbooking class
scrapbooking embellishments :: journal your christmas page numbers
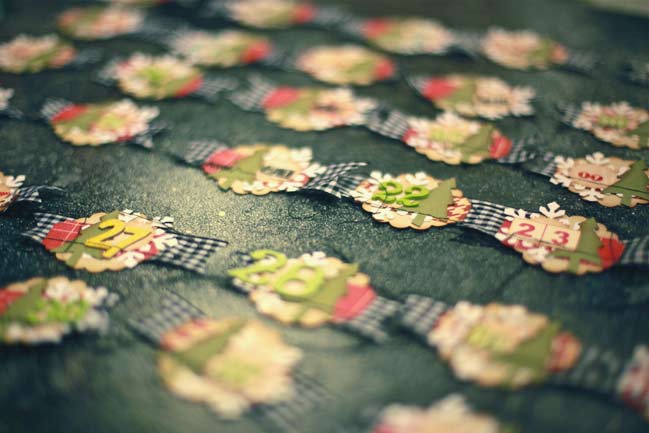
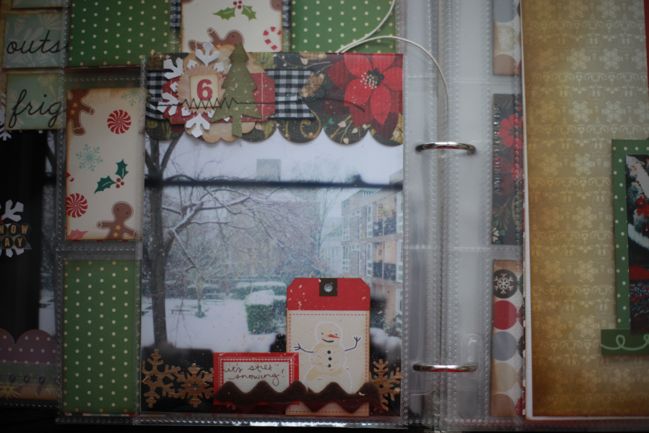
Aside from cutting pages to size, one other thing I find helpful to prepare in advance of Journal your Christmas is to create page numbers. If you intend to create daily entries in your album, then a set of numbers can help motivate you to keep those entries going and the number added to each page helps all the individual pages of the project come together as a whole. (If you take the option to make a few Christmas journal entries each year and build an album over several years, I don’t think page numbers make quite as much sense.)

I’ve created numbers in various styles over the years, but it was only this year in reviewing my past journals that I realised something: if my pages follow a similar format (all the same size, repeated colours, etc) then I like numbers that vary from day to day. If my pages are quite different (different sizes, a mix of page protectors), then I prefer the numbers to match throughout the project. Lightbulb moment!
christmas scrapbook
Last year I used a variety of page protectors, all mixed with different sizes and lots of different pockets to fill. And I kept the numbers quite similar for each day. This video shows the process I used to make them.

This year, my pages are the same size and format each day, so I’m varying the style of the numbers. Tomorrow I’ll share a selection of those!

…and yes there will be a challenge for page numbers, so if these page numbers inspire you to start creating your numbers, then go right ahead! I’ll post the page number challenge with tomorrow’s post with option B for varied page numbers.

And this is me signing out from crafty Christmas for Saturday – but there’s an early morning giveaway on Sunday so don’t be a stranger! Thanks for joining me so far and I hope you’re having a fabulous weekend.

xlovesx

Decorate a Christmas Window :: Craft Tutorial by Corrie Jones

how to decorate a christmas window :: craft tutorial by corrie jones
how to decorate a window for christmas
Next up, I’m excited to share this gorgeous project from Corrie Jones! I’ll let Corrie show you how to make something like this, step by step! Enjoy.

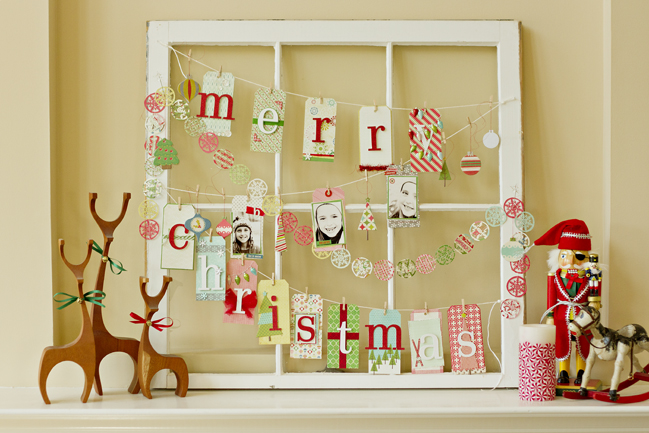
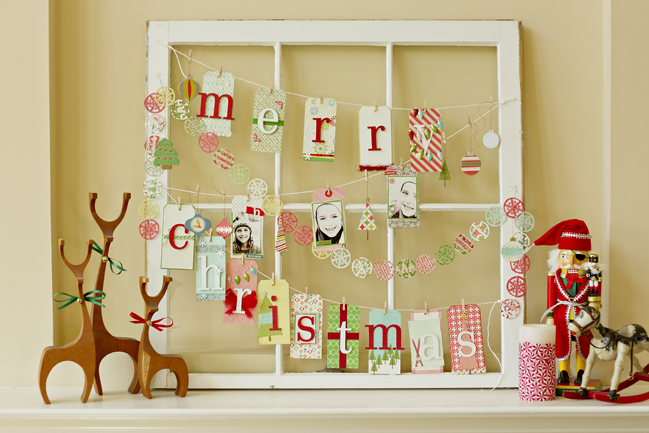
I bought this window forever ago with the intent of decorating it for my studio. I was going to create a window for myself in that windowless room. Well, it sat and sat until now, when I decided that it would be the perfect canvas for a Christmas decor project for right in my family room. Of course, this really is a garland project, and that very tag garland can be used to decorate just about anything, it definitely does not have to be an old window.

how to decorate a window for christmas
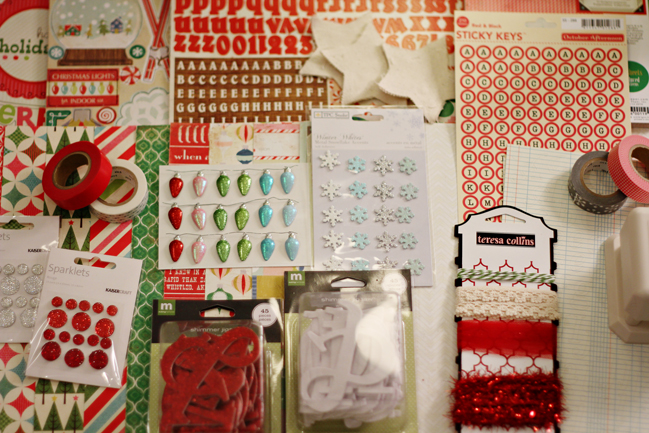
I used a bunch of Christmas supplies I had here.

how to decorate a window for christmas
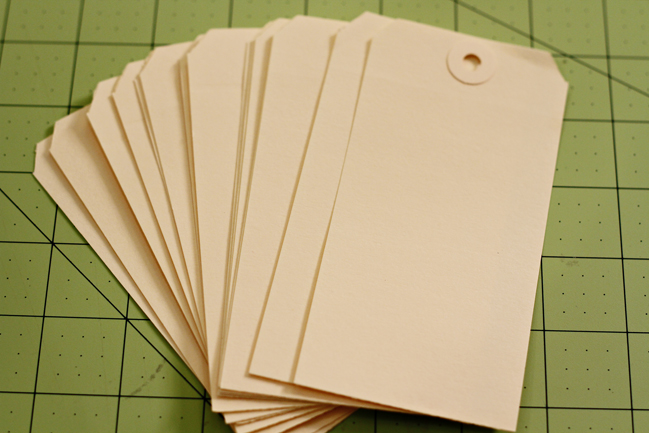
Gather a bunch of shipping tags of a size you like that will work in your space.

how to decorate a window for christmas
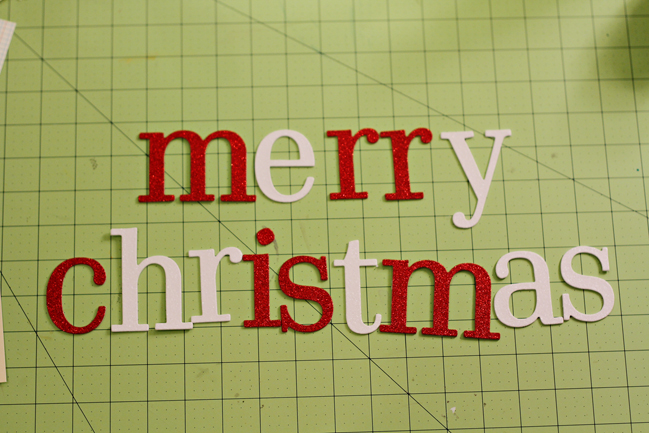
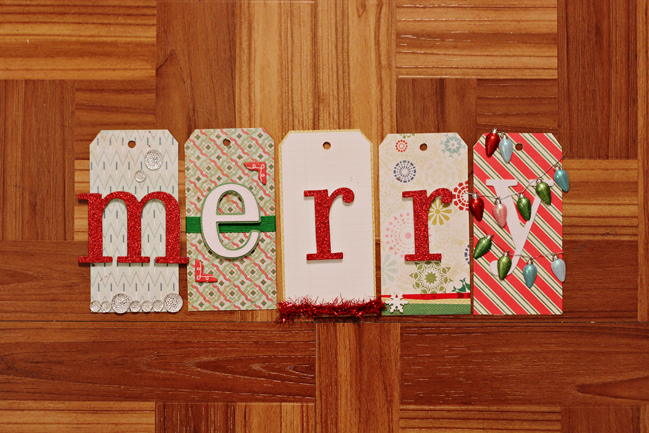
Spell out your holiday message.

how to decorate a window for christmas
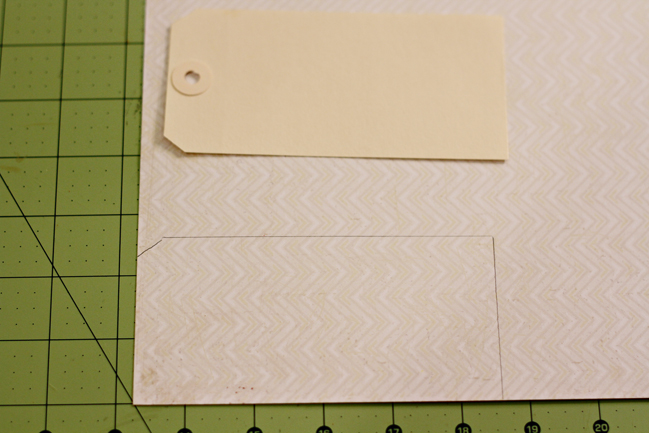
Use your tag as a template to cut out patterned paper the correct size to cover your tag.

how to decorate a window for christmas
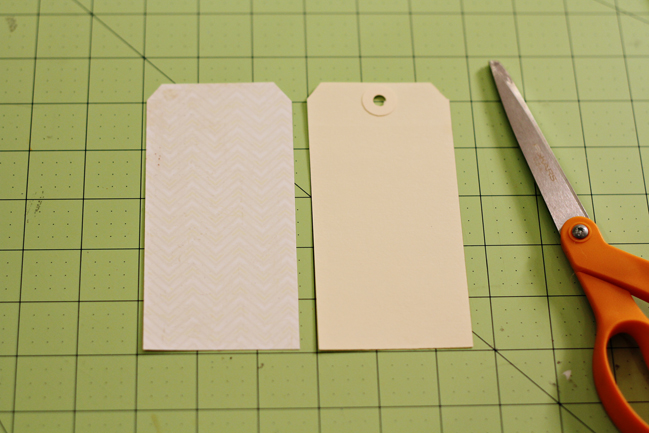
Cut out your patterned paper.

how to decorate a window for christmas
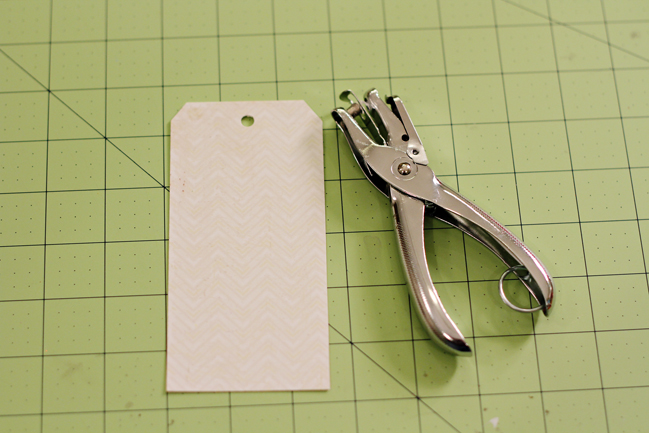
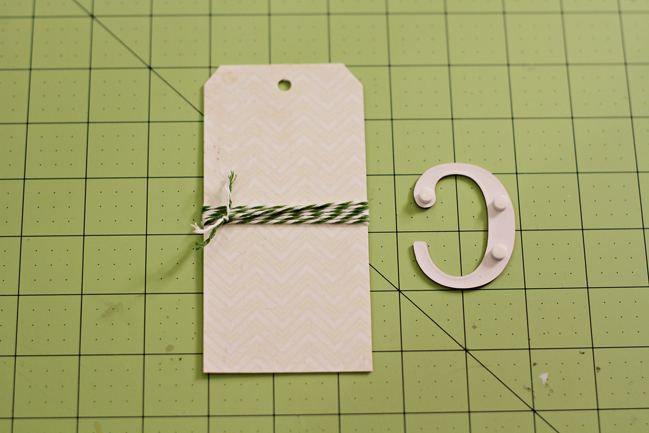
Cover your tag and punch a hole.

how to decorate a window for christmas
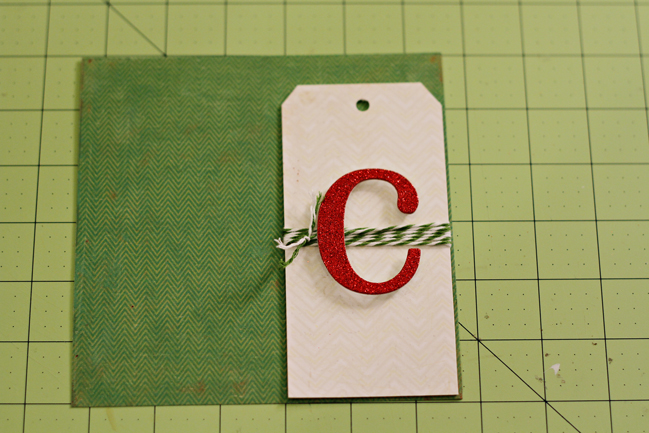
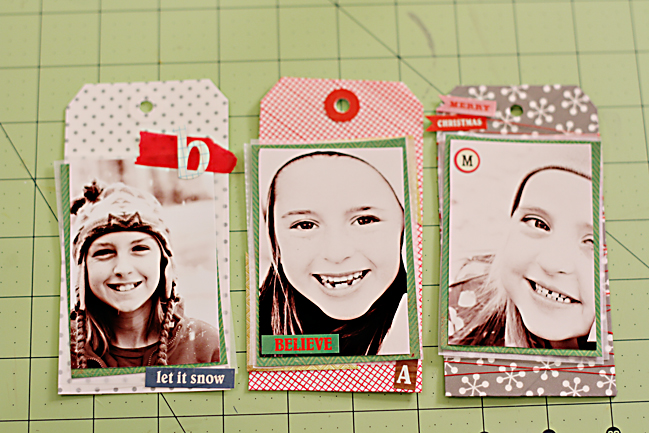
Here is the fun part. Decorate your tag. Add the first letter using pop dots. Have fun!!

how to decorate a window for christmas
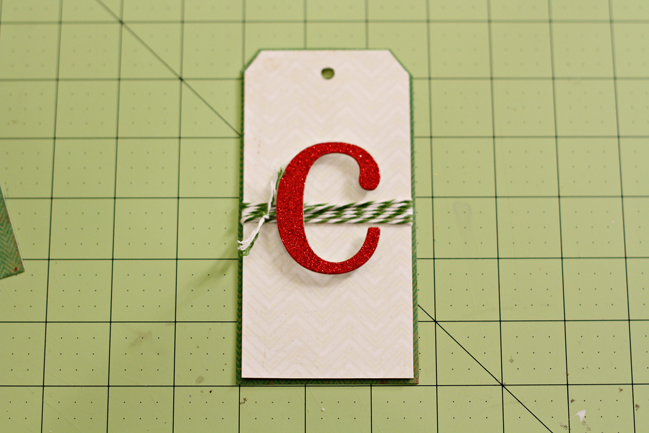
Add a bit of darker patterned paper for some depth.

how to decorate a window for christmas
Step back and be happy with your small creation. And move on to the next one.

how to decorate a window for christmas
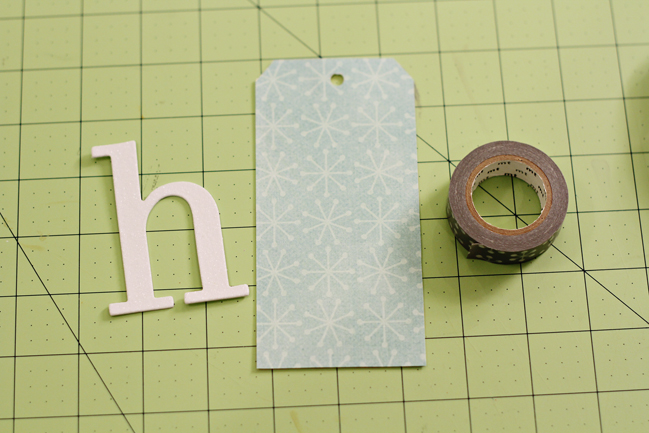
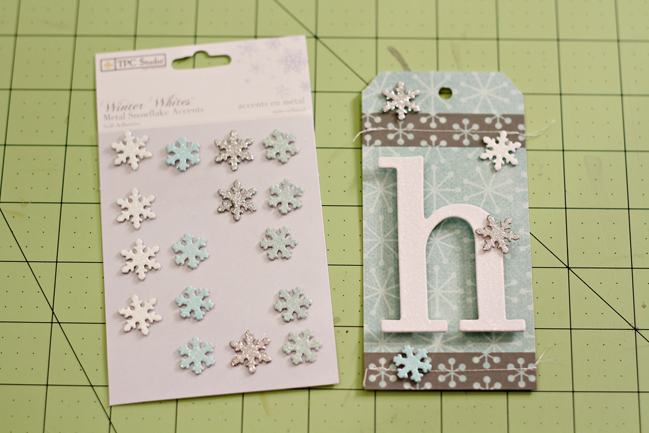
I like my tags all to be different, so here is the next one. Cover with patterned paper and use some washi tape as an accent.

how to decorate a window for christmas
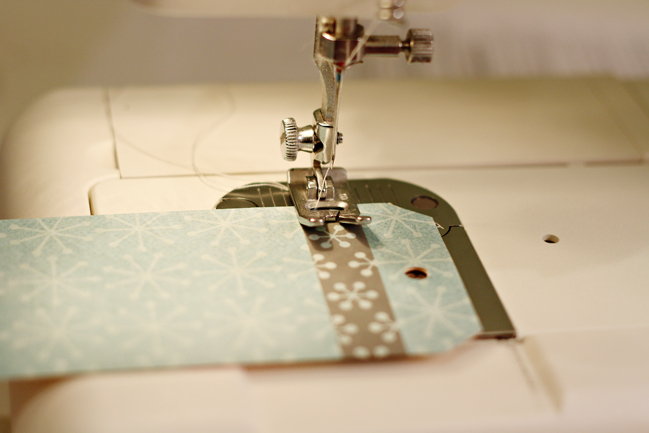
Use a sewing machine to add some stitching.

how to decorate a window for christmas
Add some metal snowflakes. (These are just ideas to get you started. Create away! One tag for each letter!)

how to decorate a window for christmas
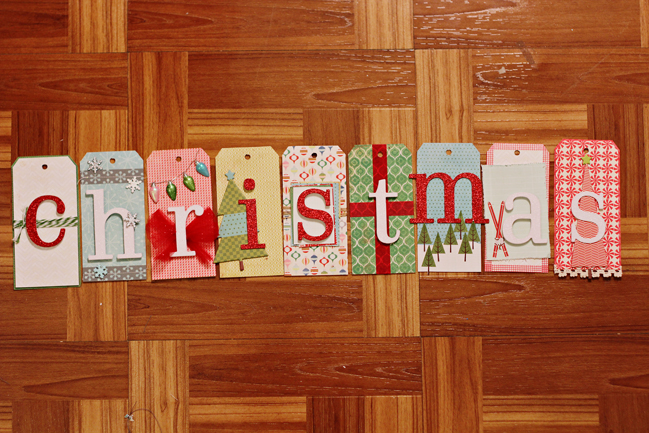
Here are all of them.

how to decorate a window for christmas
And what would a project using scrapbook paper be without some photos??

how to decorate a window for christmas
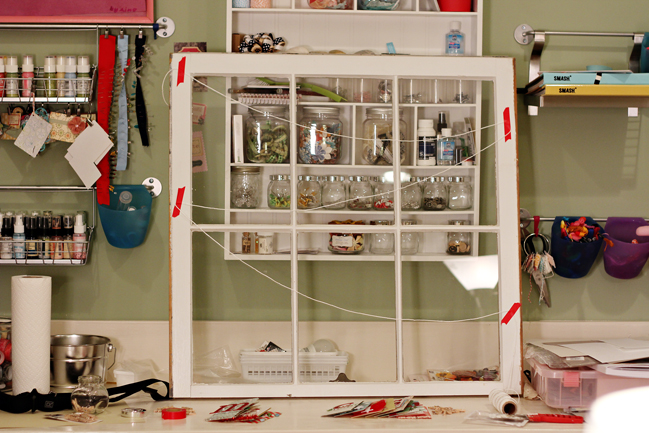
I now prepped my frame. I used my string and some tape to position where I wanted it all to be connected.

how to decorate a window for christmas
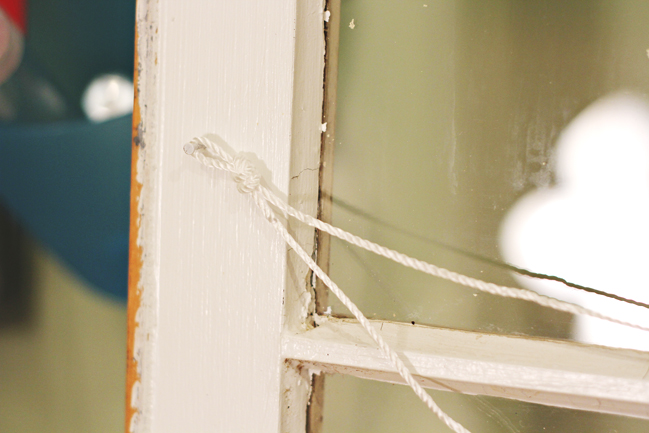
Sweetly ask someone who is good with a hammer to gentle add nails in your marked places and add your string. Knotting the string helps keep your lines in place even when the weight of the layers is different.

how to decorate a window for christmas
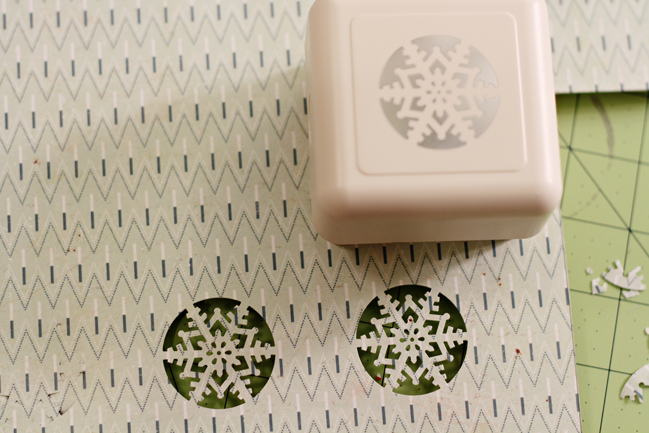
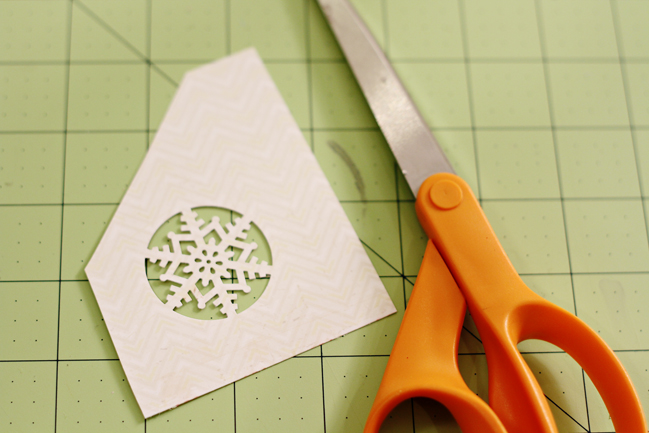
Now to make some snowflake garland. Punch out snowflake circles from various patterned papers.

how to decorate a window for christmas
Cut out around your snowflake.

how to decorate a window for christmas
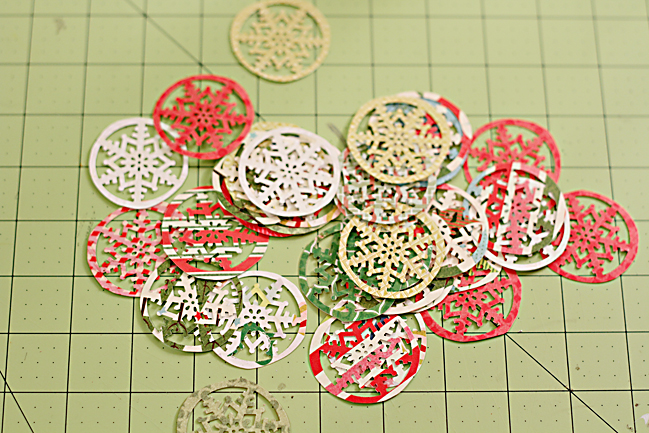
Once you have a bunch of circles, you are ready.

how to decorate a window for christmas
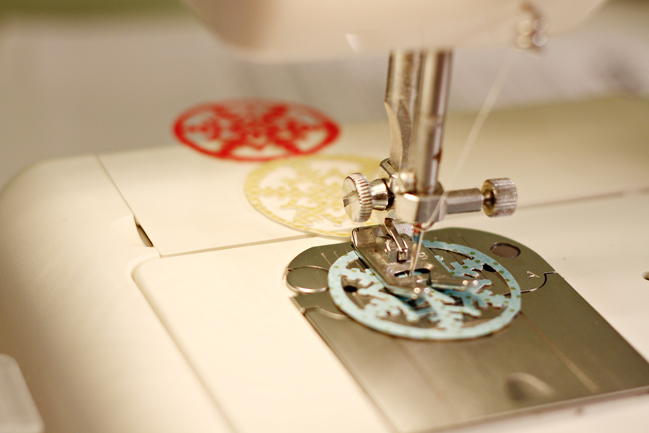
Feed the snowflake circles through your sewing machine one after another.

how to decorate a window for christmas
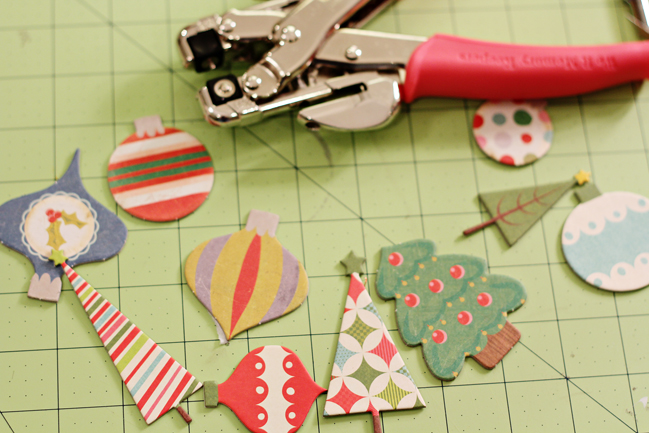
Make ornaments our of the larger chipboard shapes. Leave the backing on the adhesive. Punch holes using a crop-a-dile.

how to decorate a window for christmas
Tie the string.

how to decorate a window for christmas
Now is the fun part. Decorating!!!

how to decorate a window for christmas
Be creative and have a fun time.

how to decorate a window for christmas

Your challenge: Get creative with tags! Big tags, small tags, plain tags, shopping tags…whatever you choose! Make something big, something small. Time to tag it up! Whatever you make, take a picture and upload it to your blog or a scrapbook page gallery. Leave a link to enter. Entries close at the end of Sunday the 20th of November. One lucky entry will be randomly chosen to win a $10 gift certificate to go shopping!


About Corrie…
I am Corrie Jones. I happily design for American Crafts and Sketchy Thursdays. You can find me at my blog, or at American Crafts and Sketchy Thursdays.

3 ways to add pockets to scrapbook pages

pockets for christmas journal pages
3 ways to prepare pockets for scrapbook pages
There is a very simple reason why the Christmas class around here is called Journal your Christmas, and that’s because it is the written element of the process that really makes this project worthwhile, in my opinion. That doesn’t mean you have to write at length (though you can) and it doesn’t mean you have to write by hand (though you can) and it doesn’t mean you have to draft and redraft until it’s perfect (though you can). It’s just the idea of thinking about a certain topic and taking a few moments to compose those thoughts in writing rather than running off, mid-thought, to the next hustle and bustle of the holidays.

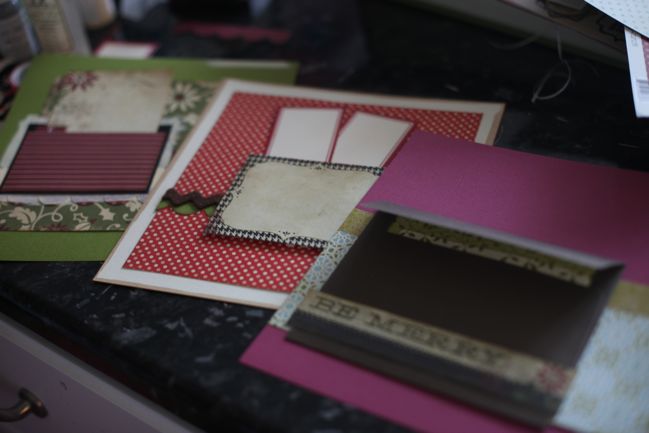
With that in mind, I love to have elements in my journal that encourage me to write a bit more than just what will fit on the front of the page. So pockets are the perfect way to throw that in the mix. About ten of my pages will include pockets of some sort where additional writing (or other papers from the season) can be tucked away for safe keeping. Here are three easy techniques to prepare pocket pages in your Christmas journal!

scrapbook page
Remember, these are just pages in progress and they will come to life throughout December. (Come to life? Really, Shimelle? It is paper you know. It’s not really going to become animate and walk in and ask for a cup of tea. Which is a good thing really because apparently I am quite terrible at making tea.) So there are no page numbers, titles or other themes yet. At this stage I just prepare a few types of pages that can then be used for any entry in the project. In terms of supplies, almost everything is from this kit I assembled earlier. Plus my three shades of cardstock (I’ve cut the pages and have a stack of off-cuts to put to use) and a few little extras I’ve mentioned specifically in each example.

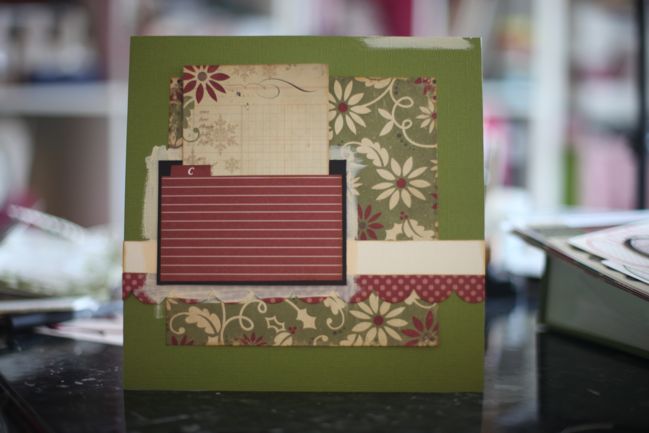
Pocket #1 is a die cut journaling card (it’s by Lily Bee and in the kit) adhered on three sides but left open at the top. I’ll probably stitch this to pocket to the page, but I tend to save up my stitching then sew a big stack of pages in one session. I’ve added part of a sheet from the 6×6 Simple Stories paper set (also in the kit) with a ledger design so there is already paper ready and waiting for writing. (By the way, a few people have asked about that 6×6 pad as it’s currently sold out. If you are signed in and click the ‘request and notify me’ link, you’ll get an email as soon as it’s back in stock. I use that button a lot actually, and it’s way easier than constantly looking to see if something is back on the shelf.)

envelope on a scrapbook page
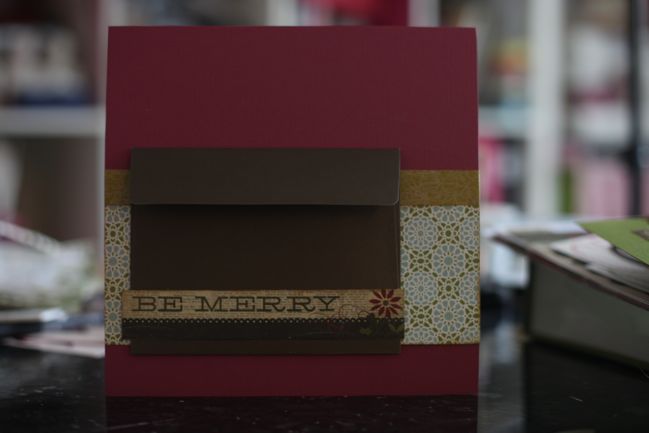
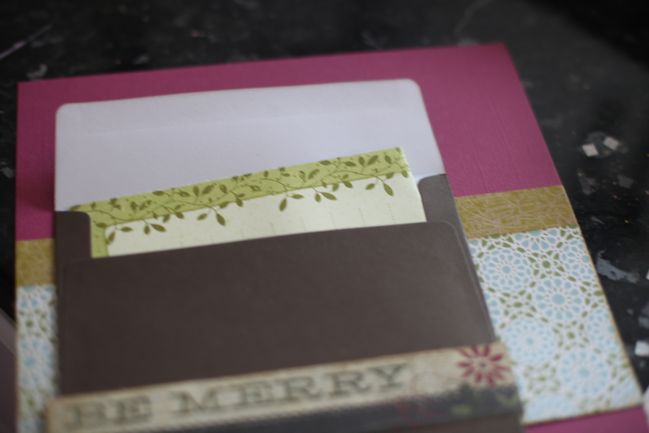
Pocket #2 I’ve used envelopes in every Christmas journal I’ve ever kept and I’m not stopping that tradition now. I use a mix of new envelopes and those that arrive in the post during December when Christmas cards start to arrive – especially if they have nice stamps! I love including our names and address written by our friends and family – there’s something very lovely when you pull a card from the letterbox and know who it’s from just by the handwriting, so I like that I can include that. But this page has a new envelope, ready to go. This was just a spare I had with a set of cardblanks (I always screw up at least one cardblank in the pack!) that I’ve glued to the page and topped with a border strip from the 6×6 paper pad. The patterned paper in the background is from the kit and the green border strip is from a roll of washi tape that I have been using so often lately that I don’t ever remove it from my desk! But that strip doesn’t need to be tape and could easily be replaced with a strip of paper.

envelope on a scrapbook page
As soon as I add an envelope, I add paper too! No excuses not to write that way. I have a giant stack of those journaling notebooks that Making Memories put out with every collection for quite a while, so I’ve pulled all the red, pink, green and cream pages and they are in my use-it-or-lose-it pile this Christmas. Whatever is left over in January will hit my donate box, as I’ve used these a lot over the years and I feel I will fall out of love with them soon. But for now, they are great for places to write!

christmas scrapbook page
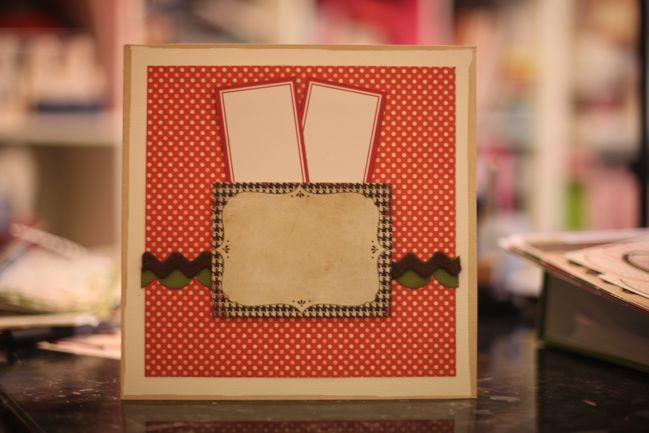
Pocket #3 Sometimes it’s nice to have a pocket with some dimension so you can add more than a sheet or two of paper! I started this page with a 7×7 block of patterned paper (from the kit) and punched a border strip of cardstock (from the off-cuts pile) and added a bit of felt trim (this isn’t from the kit – any ribbon or fabric scrap would work or a border sticker). The journaling card in the middle of the page is cut from the 6×6 paper pad (the same as the other pages) and this time the pocket is adhered with foam tape to create the dimension. Use a roll of foam tape or a handful of pop dots to adhere the card on three sides, leaving the top open to hold whatever is needed. I’ve started with two labels cut from a Jenni Bowlin accessory sheet (from the kit) and I’ll probably add some real Christmas paper here too, like a tag from a present or part of a Christmas card.

Your challenge is to prepare a pocket for a Christmas page of your own! If you prefer to scrap some Christmas photos for your 12×12 albums, go for it with a completed page and a pocketful of writing. Or you can prepare pages ready for December! Whatever you make, take a picture and upload it to your blog or a scrapbook page gallery. Leave a link to enter. Entries close at the end of Sunday the 20th of November. One lucky entry will be randomly chosen to win a $10 gift certificate to go shopping!


Christmas Card Tutorial by Pam Brown

christmas card tutorial
christmas card by pam brown
For our first tutorial today, I’m happy to welcome Pam Brown with a Christmas card project for you! Don’t miss you challenge at the end of this post!

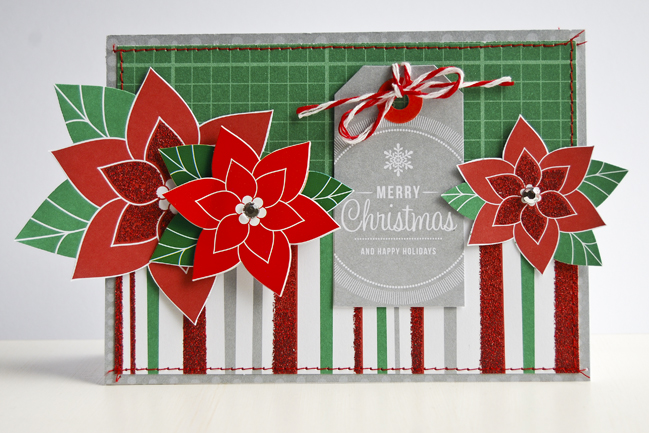
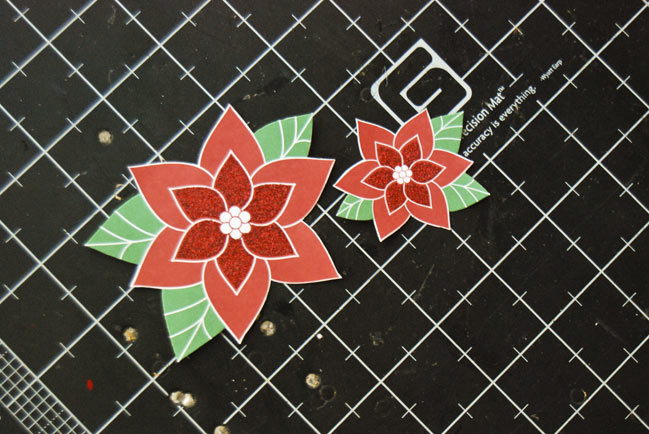
I am pretty much at a loss when it comes to using patterned paper with big, bold prints. The best way for me to tackle them is to use them in small doses, or cut designs from them and use that as an embellishment. Here I cut the poinsettias out from a piece of patterned paper and used them as embellishments for my card.

christmas card tutorial
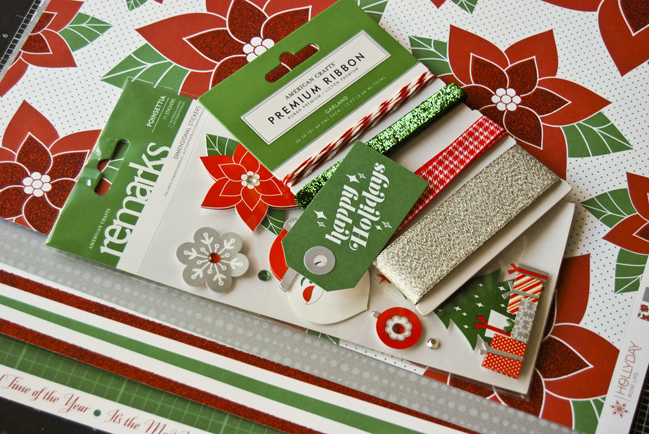
Gather up your supplies. You will need a couple of sheets of patterned paper, make sure one has a floral print, or some kind of large print you can cut out, ribbon, a sentiment tag, and dimensional stickers (or whatever embellishments you would like!).

christmas card tutorial
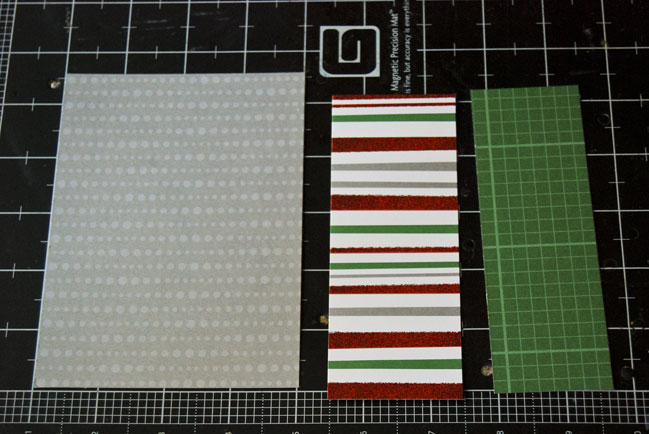
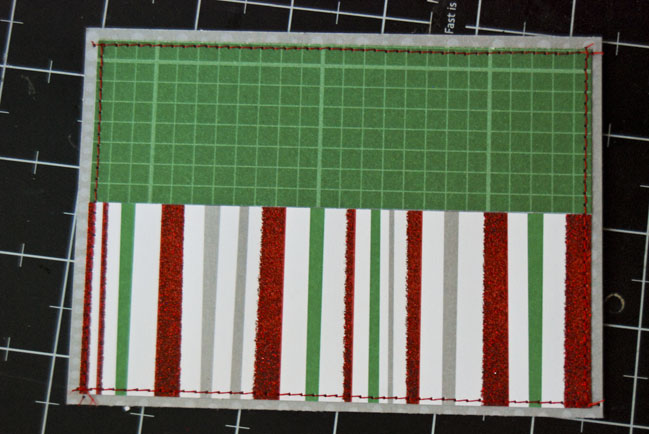
Create a card base measuring 5.5 inches wide and 4 inches high when folded. Trim one piece of patterned paper to measure 5.25 inches wide and 2 inches high, and the other to measure 5.25 inches wide and 1.75 inches high.

christmas card tutorial
Adhere the strips of patterned paper to card base and stitch around the edges.

christmas card tutorial
Cut 2 poinsettias (or other flowers) from patterned paper.

christmas card tutorial
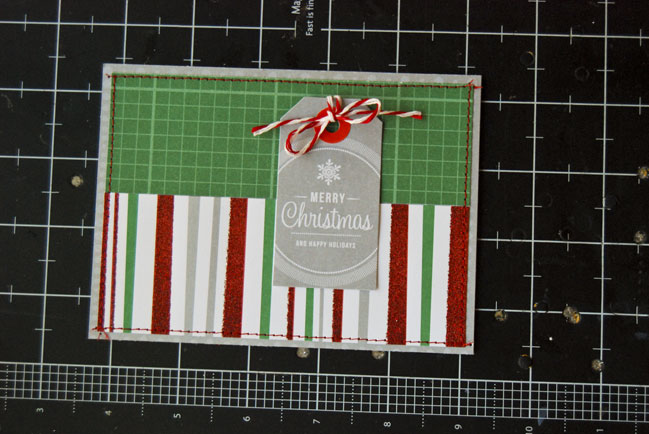
Add tag slightly off center to the right of the card. Tie ribbon through tag.

christmas card by pam brown
Add poinsettias cut from patterned paper, as well as a dimensional sticker and you are done!

Your challenge: Create a project with a design you have cut from patterned paper – like the poinsettias in Pam’s card. Take a picture and upload it to your blog or an online gallery, and share a link with the button below. Entries close at the end of next Sunday, the 20th of November. One randomly selected entry will win a $10 gift certificate to go shopping for scrapbook stash!


About Pam…
My name is Pam Brown, and I live in Santa Rosa Beach, FL with my 2 kiddos and husband. I started scrapbooking after the birth of my daughter in 2005, and haven’t looked back since! I feel so lucky to design for American Crafts, Ormolu, and My Scrapbook Nook kits. I also enjoy photography, sewing, cooking, baking, and running. Please visit me at my blog and follow me on Pinterest.

Scrapbooking with the early birds!

Scrapbooking with the early birds
Christmas scrapbook page
Here’s a very simple challenge for the early bird crowd! You don’t need to make a thing, but rather share something you have already made. Share a link to a favourite Christmas project you have made – whether it was this year or many years ago (just not something you have made this weekend).

From all the links posted, one will be randomly chosen to win a $10 gift certificate to Two Peas to choose some new scrapping stash!

Be quick – this challenge ends tonight, not next weekend like the other challenges. Now link us up and show off something you have made!


Making Christmas garland

christmas tag garland
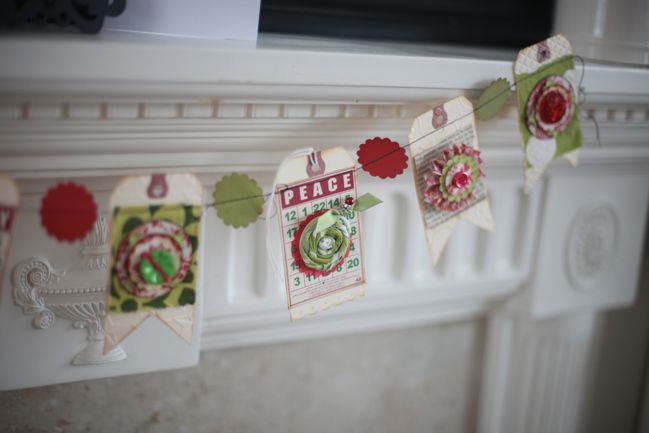
Most of the projects this weekend are brand new, but there are a few favourites from earlier Christmases that I just had to bring out from the archives. Like this tag garland from last Christmas. I loved this garland – both having it hanging in our home and making several different versions with friends and in workshops. I love the idea of a tag Advent calendar or even keeping your Christmas journal on tags by decorating the front and writing on the back. I love how they can hang on the wall or the fireplace or the tree.

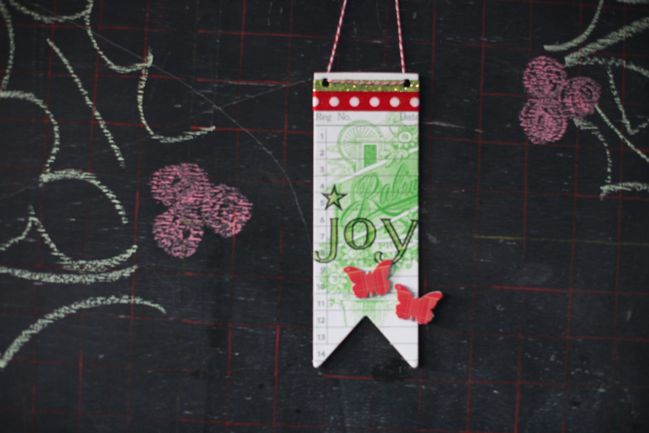
We’re making a new kind of garland with the JBS team this year. Each of us has made our own single piece for the garland, but we had to make them all without knowing what anyone else had chosen. And we’ve sent them off to Tennessee where they will be strung together as one full garland. My link in this year’s banner includes layered rub-ons and a bit of stamping.

christmas banner


See the banner come together at the JBS Inspiration blog.

Your challenge: well, make a garland of course! Whether it’s something you will hang on the wall or an accent on a page or a card, there has to be garland involved. Make it, take a picture and upload it to your blog or a page gallery. Then link it up with the button at the end of this post. Entries close at the end of next Sunday, the 20th of November. One randomly selected entry will win a prize pack of scrapbooking supplies!


Choosing a size for a Christmas Journal

choosing a size for your christmas journal
christmas journal and pages
Let me say to start, there are those who love to prepare most of their Christmas album early and there are those who prefer to make something each day with little to no planning in advance. If this is your first year considering such a project, know right from the very beginning: either option can work. Over the years, I’ve tried various amounts of preparation, from making my pages completely in advance and just filling in the words each day to making each page from scratch at the end of each evening. Personally, I found my happiest method is right in between, and that means I prepare some embellishments – but not complete pages – in advance. I’ll share more about that specific process throughout this weekend. But the big decision comes in the size of your album.

My first Christmas journal was my smallest – a 5×5 inch spiral book with watercolour pages. In other years, I’ve created full 12×12 pages, 8.5×11 pages, pages in a mix of sizes, 5×7 pages and 8×8 pages. In fact, I’ve made three 8×8 albums and two of them are my favourites, and I have happily declared this as my favourite size. This year, I’m returning to 8×8 and I’ll be using a fabric-covered ring-binder in leaf green with plenty of 8×8 page protectors.

When choosing the size of your album, think about a few key factors:
…how many photos you will want to include,
…your preferred size for printing those photos,
…if you want to write a great deal or just a bit, and
…how much time you want to spend on your entry each day.

The more photos or the larger you want your photos, the bigger your pages will need to be. The more you writing you want on display, the bigger your pages will need to be. But in general, smaller pages can take far less time! So there’s a balance for you to choose. If you’re working in a digital format, you can narrow your options slightly by choosing if you will go for square or rectangle! If you opt for square pages, you can choose the size later when you print the book. (Just be sure to create the pages at the bigger size as you can print something smaller but if you try to blow up the image larger, it will loose a great deal of the quality.)

But really, you can go in absolutely any direction with this project. You can grab a notebook and doodle and write and paste things on the pages. You can get an album with page protectors – regular page protectors or fancy pages with pockets and different sizes. You can go extra-special and create a drawer full of library cards or fill a recipe box or a photo spinner! A journal doesn’t necessarily have to be in book form. And using what you have is fabulous. All different sizes and shapes will work!


Once you have chosen your album, there is one thing I do suggest doing no matter how much preparation you choose to do before December begins, and that is cut at least some paper to size so you have pages ready and waiting. You know how you prefer to create: with solid cardstock or patterned backgrounds; brights, neutrals or muted tones. Go with what you like in your general crafting! If you cut at least a small stack of pages to start, that’s one less thing you will need to think about on a daily basis – if you decide to create an entry every day. Remember, that is just one way to follow the project, and there’s no need to feel you’re not creating something worthwhile if you only create a page when your schedule allows. Cutting your page backgrounds in advance also lets you see exactly which off-cuts you have to work with as embellishment on other pages. If you know your largest page size is smaller than 12×12, you can also cut any other papers you’ve selected to that size, as you won’t need a full 12×12 sheet in an 8×8 album, of course! This is particularly helpful if you need to take your project with you throughout the month or pack it into a small space (or if you need a little extra encouragement to use your paper rather than keep putting it back on the shelf).

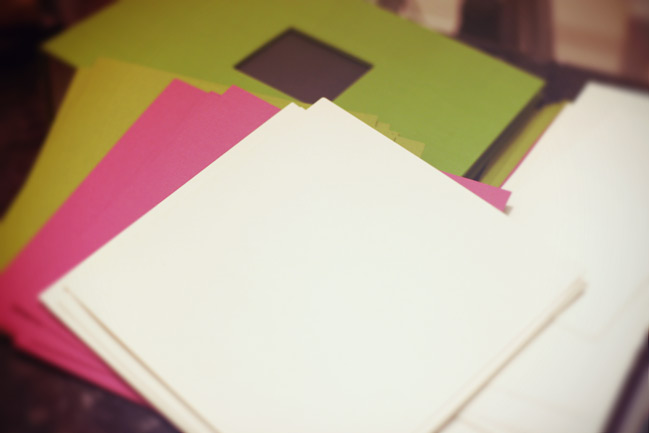
I’m creating 8×8 pages this year, and I’ve cut forty background sheets. I’m using just three colours of cardstock this year – olive green, berry pink and vanilla, to go with all the patterned paper I’m using from this selection of supplies and have since popped the background pages into the page protectors. All ready to go! And now it’s your turn…

Your challenge: choose your album and cut at least some of your background papers (if your album doesn’t come with pages already, of course). Take a picture and post about this part of your process on your blog or in a scrapbook gallery. Link it up with the little gadget below, and one randomly selected entry will win a $10 gift certificate to Two Peas! Entries close at the end of next Sunday, the 20th of November.


PS: UK friends, if you don’t have your album yet, there is a post for you tomorrow that might involve a bargain. You know… if you are still searching.

Woven Christmas Card Tutorial by Melissa Mann

woven christmas card tutorial by melissa mann

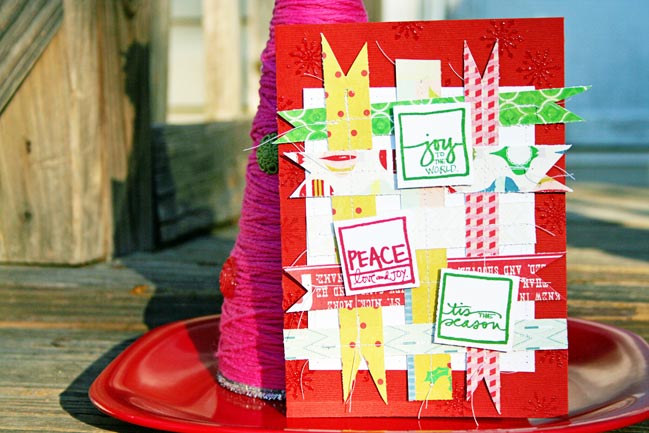
For our first tutorial, I’m happy to welcome Melissa Mann, who has a favourite cardmaking technique to share. Don’t miss the challenge at the end of this post!


Hey everyone! I absolutely LOVE Christmas! It is by far my favorite holiday and I especially love Christmas cards! I love sending them and receiving them so I have worked up a little Christmas card tutorial that has a paper weave technique to it! This card can be made in a very simple fashion or a very detailed fashion. Let’s get crafting!

christmas card
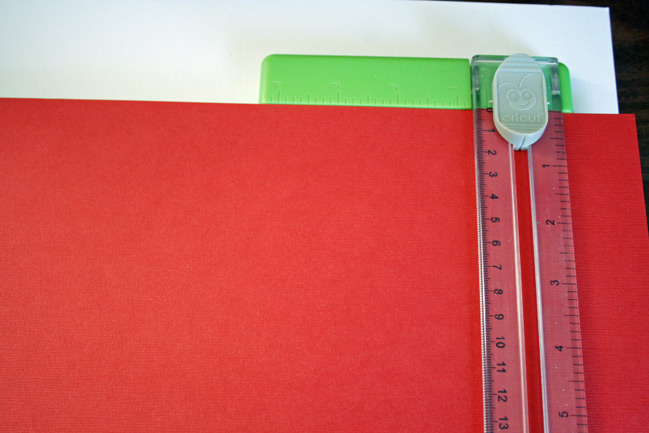
Cut a piece of red card stock to 10” x 7” and fold in half to create a 5” x 7” card.
Cut a piece of white card stock to 4” x 5”.

christmas card
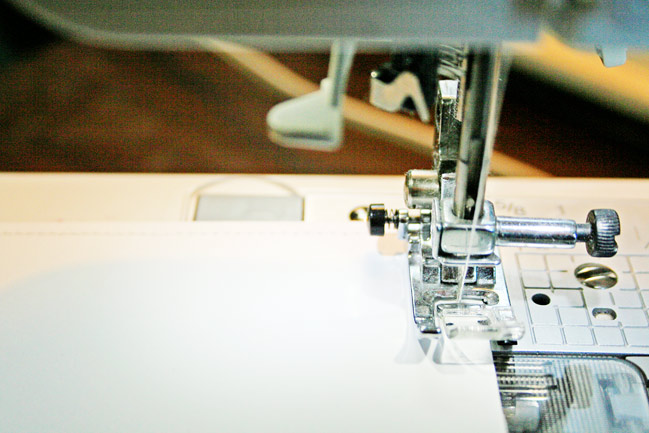
Using your sewing machine, stitch along the outside edge of the white block of paper. Set aside.

QUICK TIP: Draw in faux stitches using a pen – red stitches would be lovely!

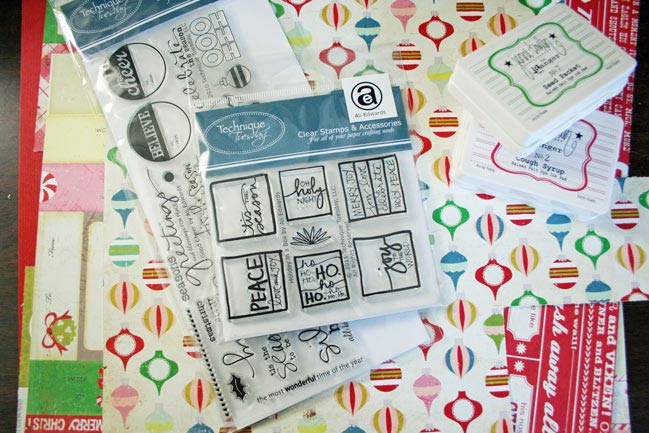
supplies for christmas card
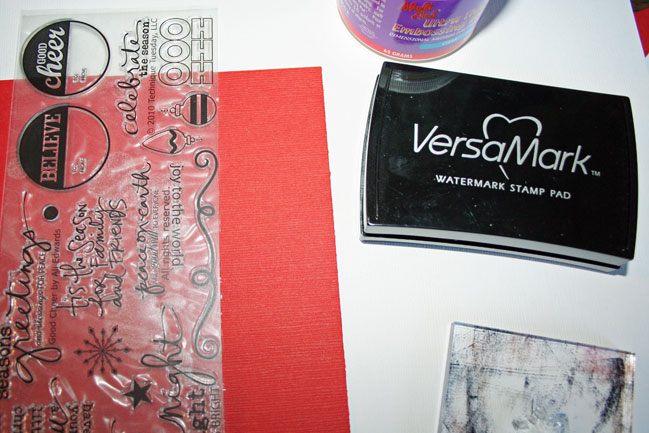
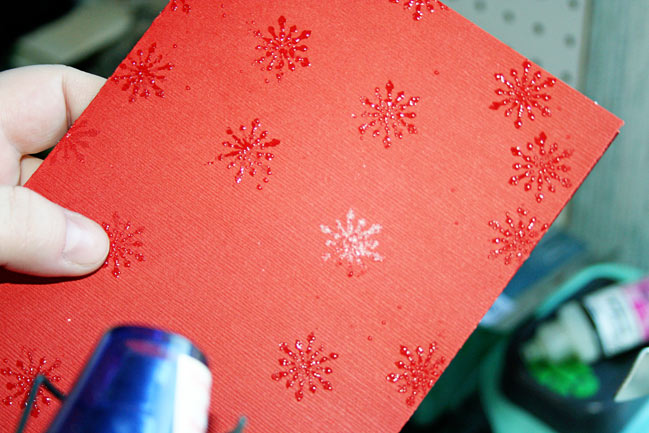
Take the snowflake stamp and using Versamark ink, stamp all over the red card stock.

christmas card
Liberally sprinkle UTEE all over the stamped images and spread around by shaking the card. Then, shake off the excess UTEE onto a scrap piece of card stock.

christmas card
Using your heat gun, set all of the images that were stamped until the UTEE has melted. You will see a nice glossy watermark image of your snowflake on the red card stock.

QUICK TIP: Instead of going through the various steps of embossing your image, you could also simply use a shade of red ink and achieve the same tone on tone look as the embossing has.

Take the stitched white block of card stock and adhere to the center of the red card stock.

supplies for christmas card
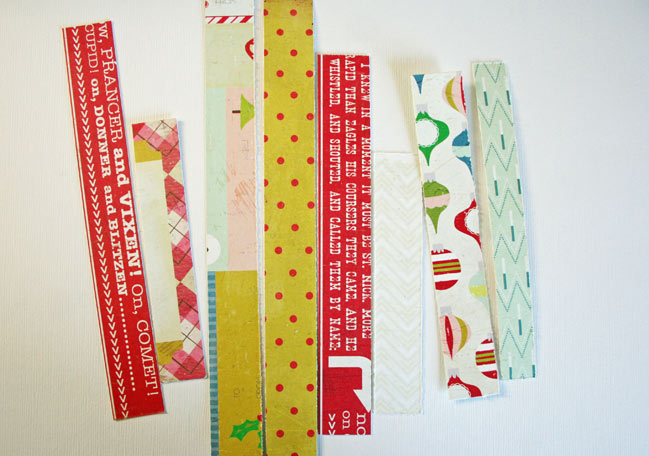
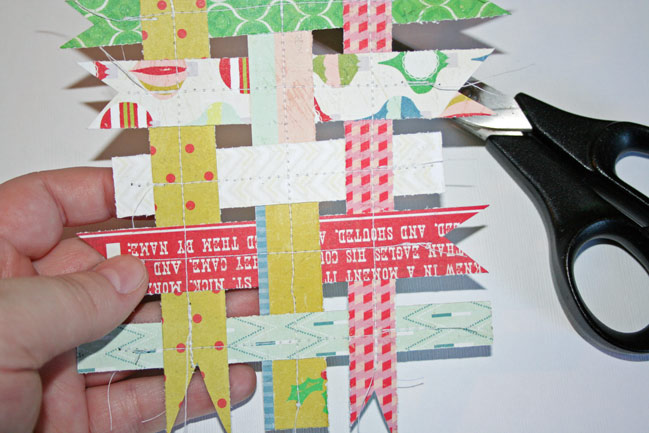
Cut out some strips of pattern paper in different patterns into various sized strips.
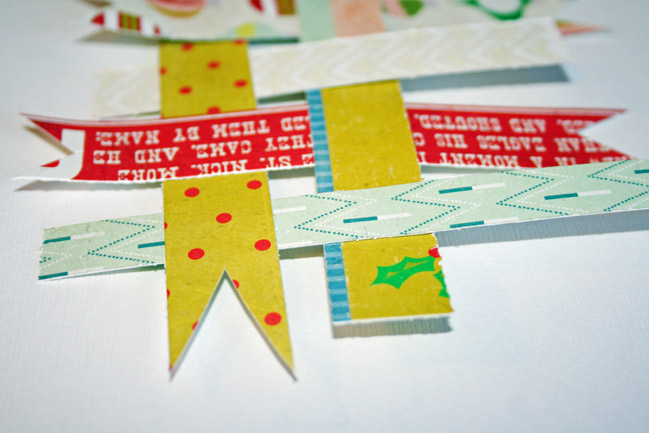
Snip some of the ends of the strips in a pennant style.

supplies for christmas card
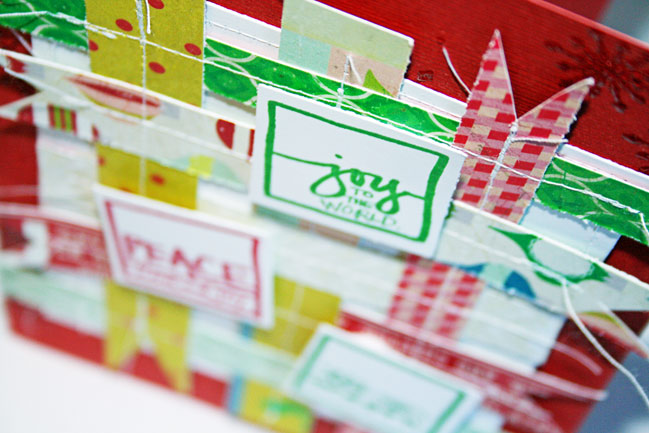
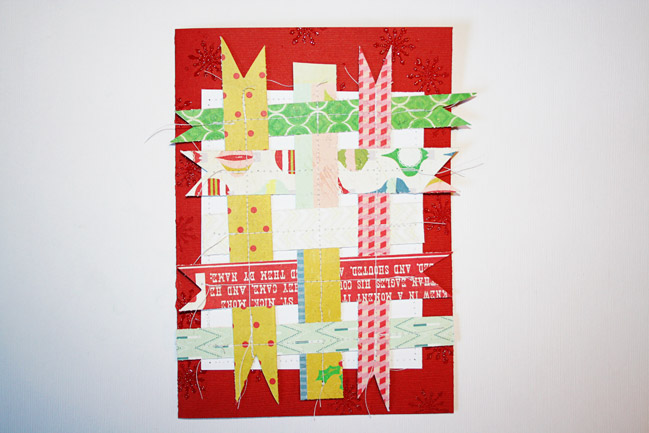
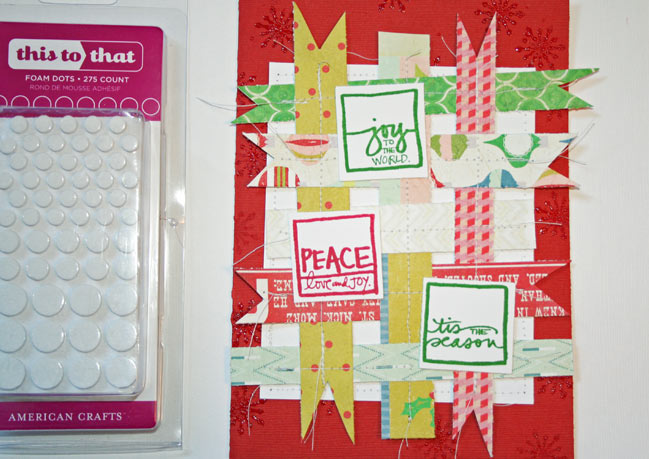
Weave the paper strips together. Lay down the three vertical strips and using some shorter strips of paper weave them horizontally through the vertical strips.

supplies for christmas card
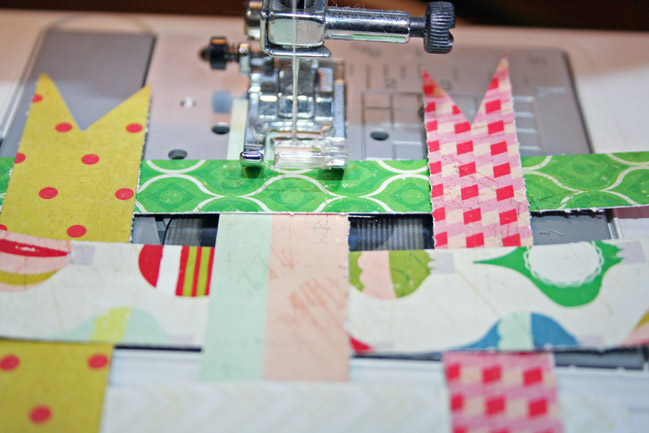
Sew the strips together with your sewing machine. I started with the very middle vertical strip of paper – this anchored all of the horizontal strips and made it easier to run them through the sewing machine. I also left the ends of my threads – it gave it more of a quilted, handmade look.


QUICK TIP: Instead of taking time to sew down each strip, you could also glue them together or staple them together.

christmas card
Take the entire weaved paper piece and adhere down on top of the white card stock. Set aside.

making a christmas card
supplies for christmas card
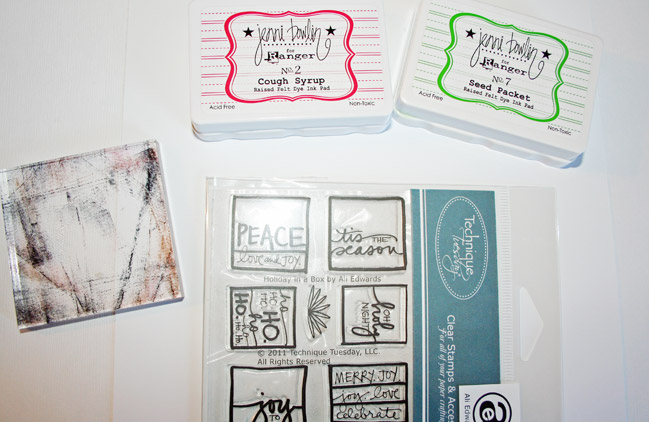
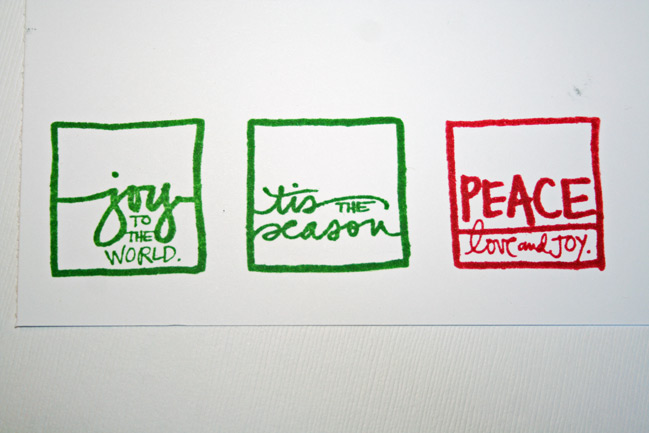
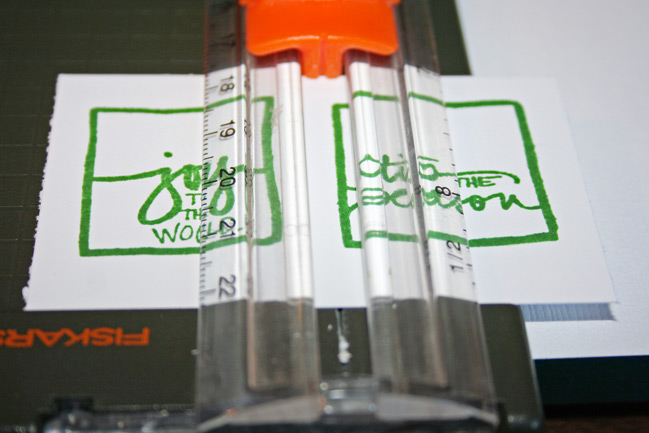
Take the “Holiday in a Box” stamps and stamp out three images onto white card stock using red and green ink.

supplies for christmas card
Cut out the images.

supplies for christmas card

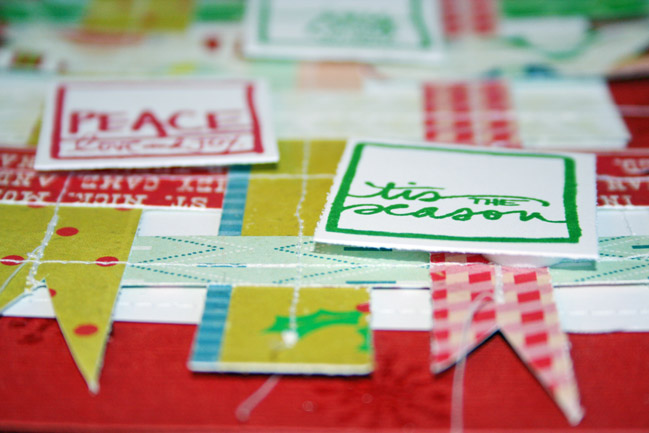
Use dimensional dots on the backs of the stamped boxes and place randomly on the front of the card.


This card is perfect to use up some of those strips of pattern paper that are lying around! And, since you are using stamped images on the front, it is super easy to just stamp out a ton of the little images! I challenge you to create a project whether it be a card or layout that uses the paper weave technique! Super simple but it has a big impact!

Your challenge: use Melissa’s woven paper technique on a Christmas project (a card, tag, scrapbook page or something else you create) and post it online. Share a link below to enter. One randomly selected entry will win a $10 gift certificate to Two Peas in a Bucket.


About Melissa…
My name is Melissa Mann and I live on the beautiful Gulf coast of Florida! I live with my wonderful husband of almost 8 years and my two dogs and one cat. My day job consists of being a team lead for the reservations staff at a condo. started scrapbooking in 2005 and have been honored to be on several design teams and be published in Scrapbook Trends and Cards Magazines. I currently design for American Crafts, Blue Moon Scrapbooking, The Girl’s Loft, and SEI. You can check out my blog. I am also on Twitter, Pinterest, and Facebook.